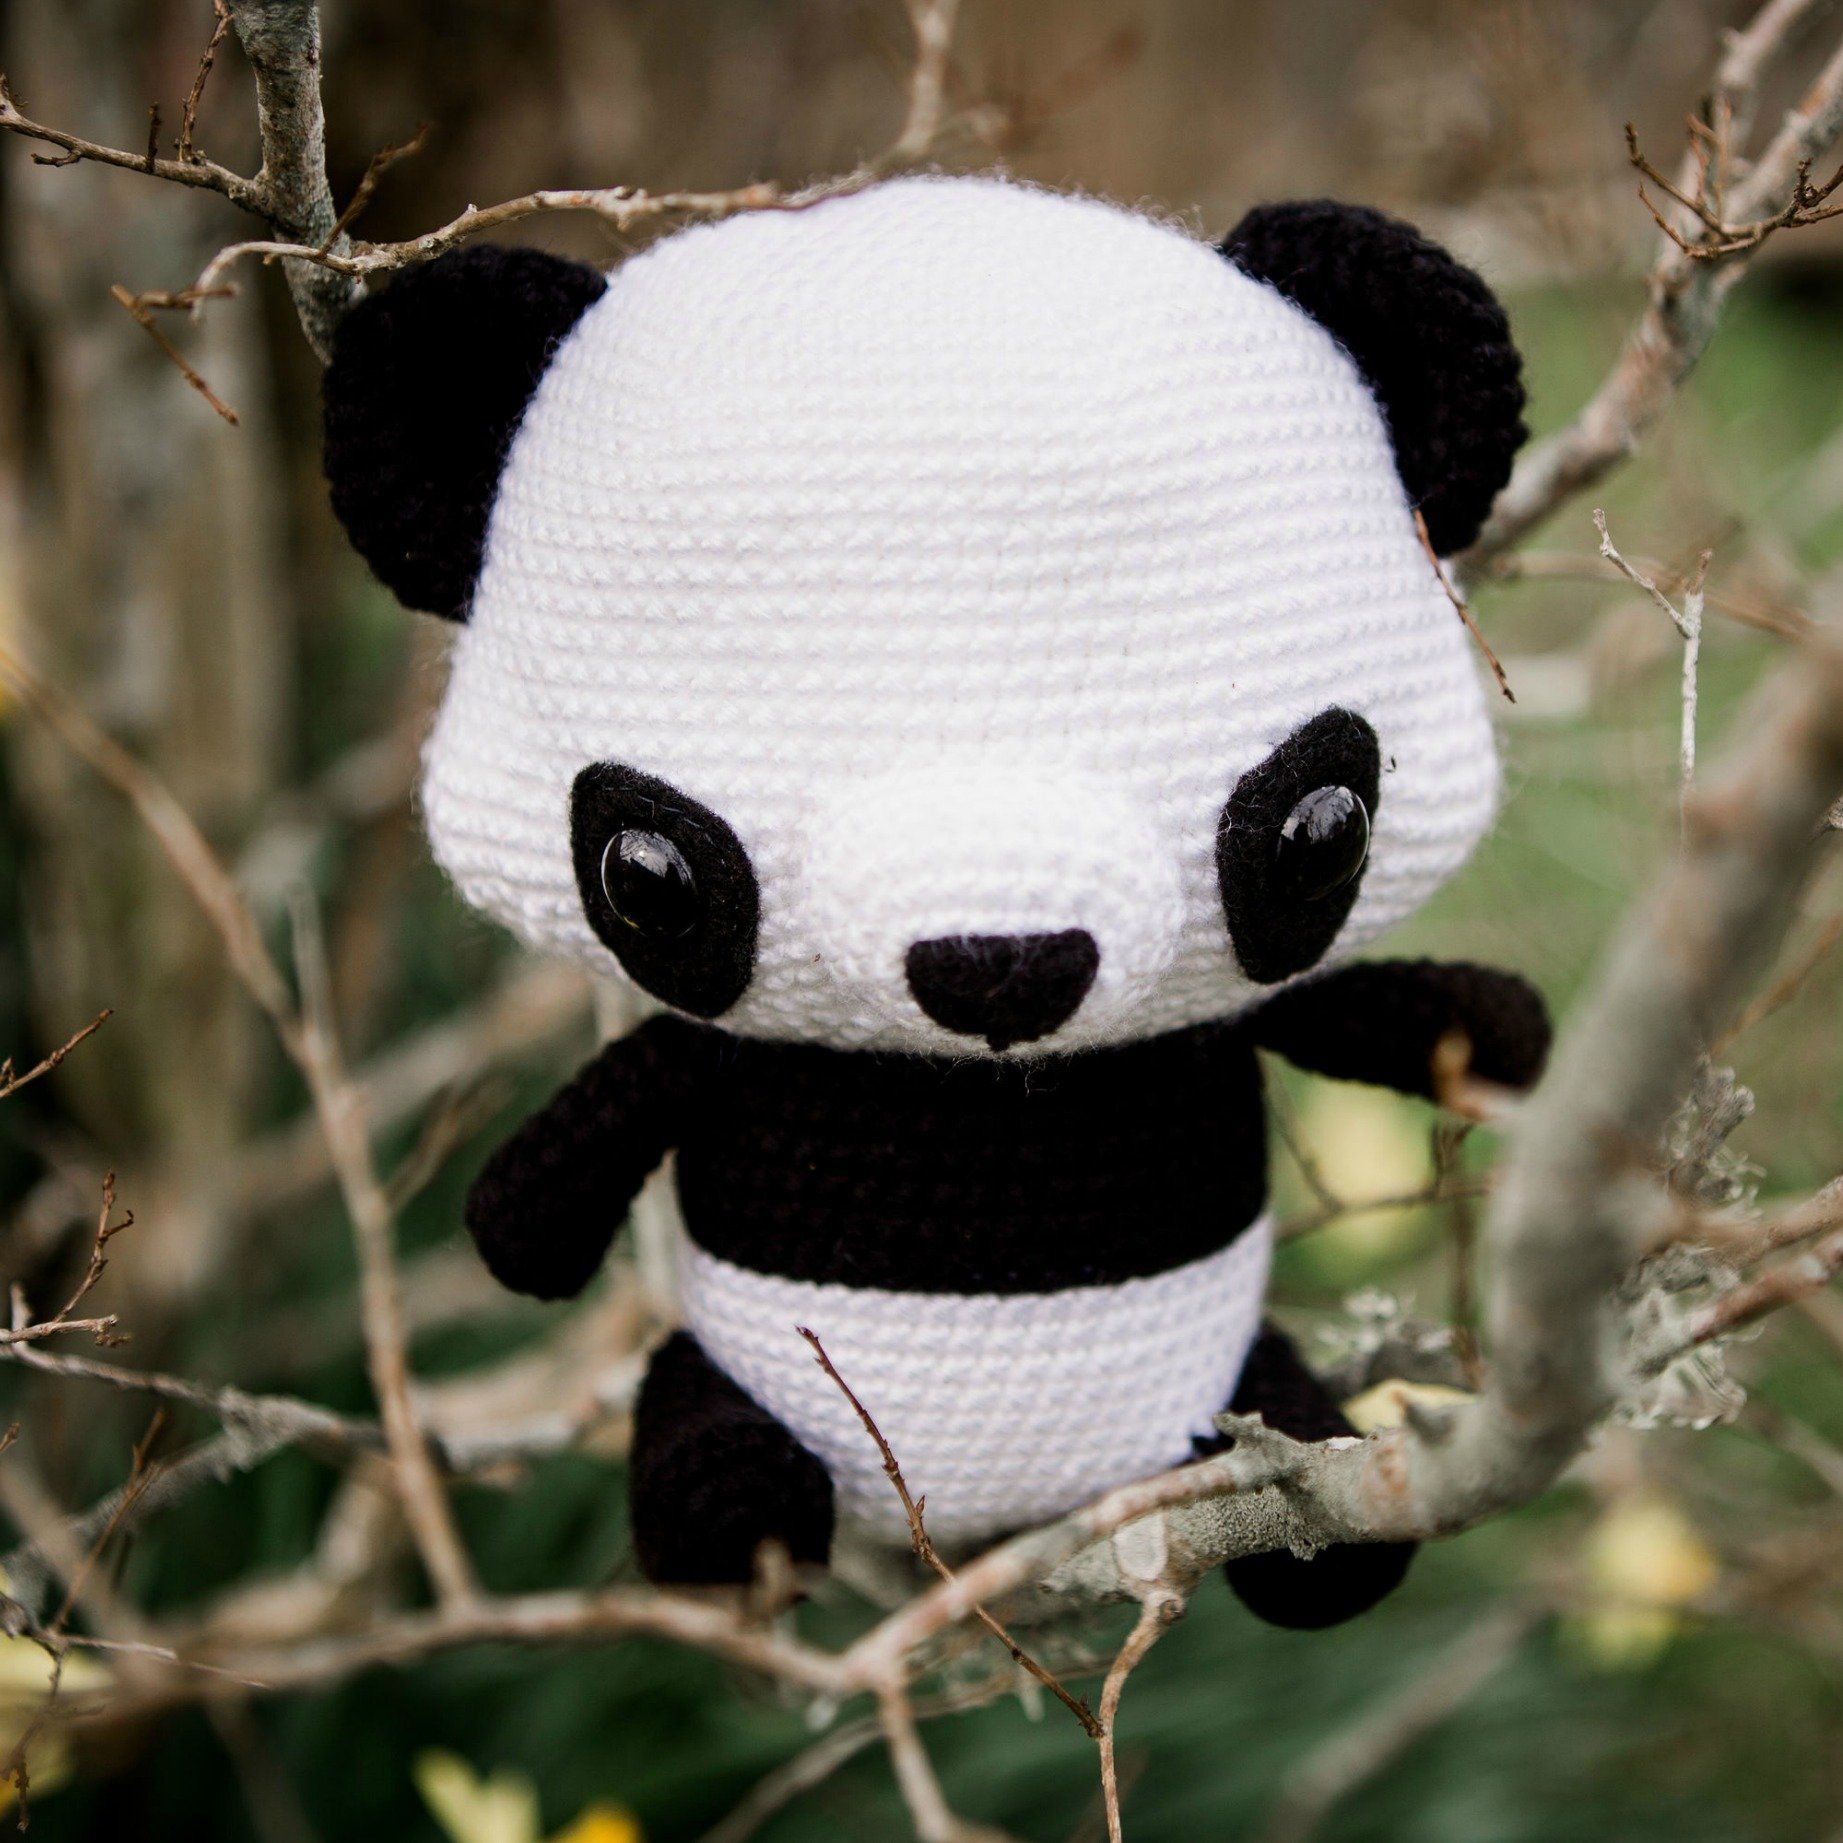
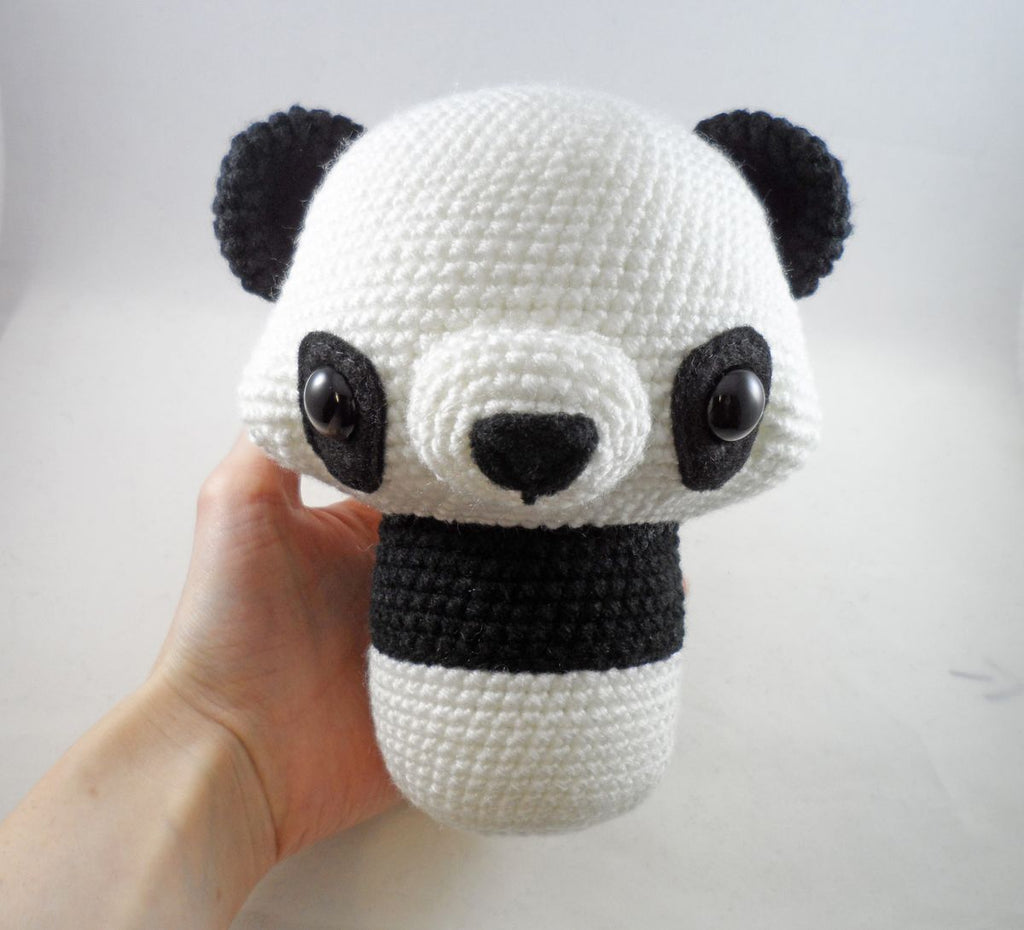
Meet Chen the Panda Bear! In Chinese Chen’s name means “break of day” which suits him perfectly because he loves to get up early and watch the sunrise! Chen loves to eat bamboo and relax in the sunshine. He’s also very fond of snuggles and would love to be your friend!

ABOUT OUR DESIGNER
I’m Holly and I started my little business, Storyland Amis in 2015! I’ve always loved designing things even before I knew how to crochet. I used to draw all the time or design knitted dishcloth patterns. Then my sister taught me how to crochet in 2012 and fell in love with it right away! I’ve been designing my own amigurumis almost since the beginning!

My passion is crocheting amigurumi, or ami for short, which is the Japanese art of crocheted or knitted stuffed animals. There are so many possibilities when you have a hook and some yarn! I never get tired of coming up with new designs and often lie awake at night dreaming up some new plushie.
Blog / Facebook / Instagram / Pinterest
SUPPLIES
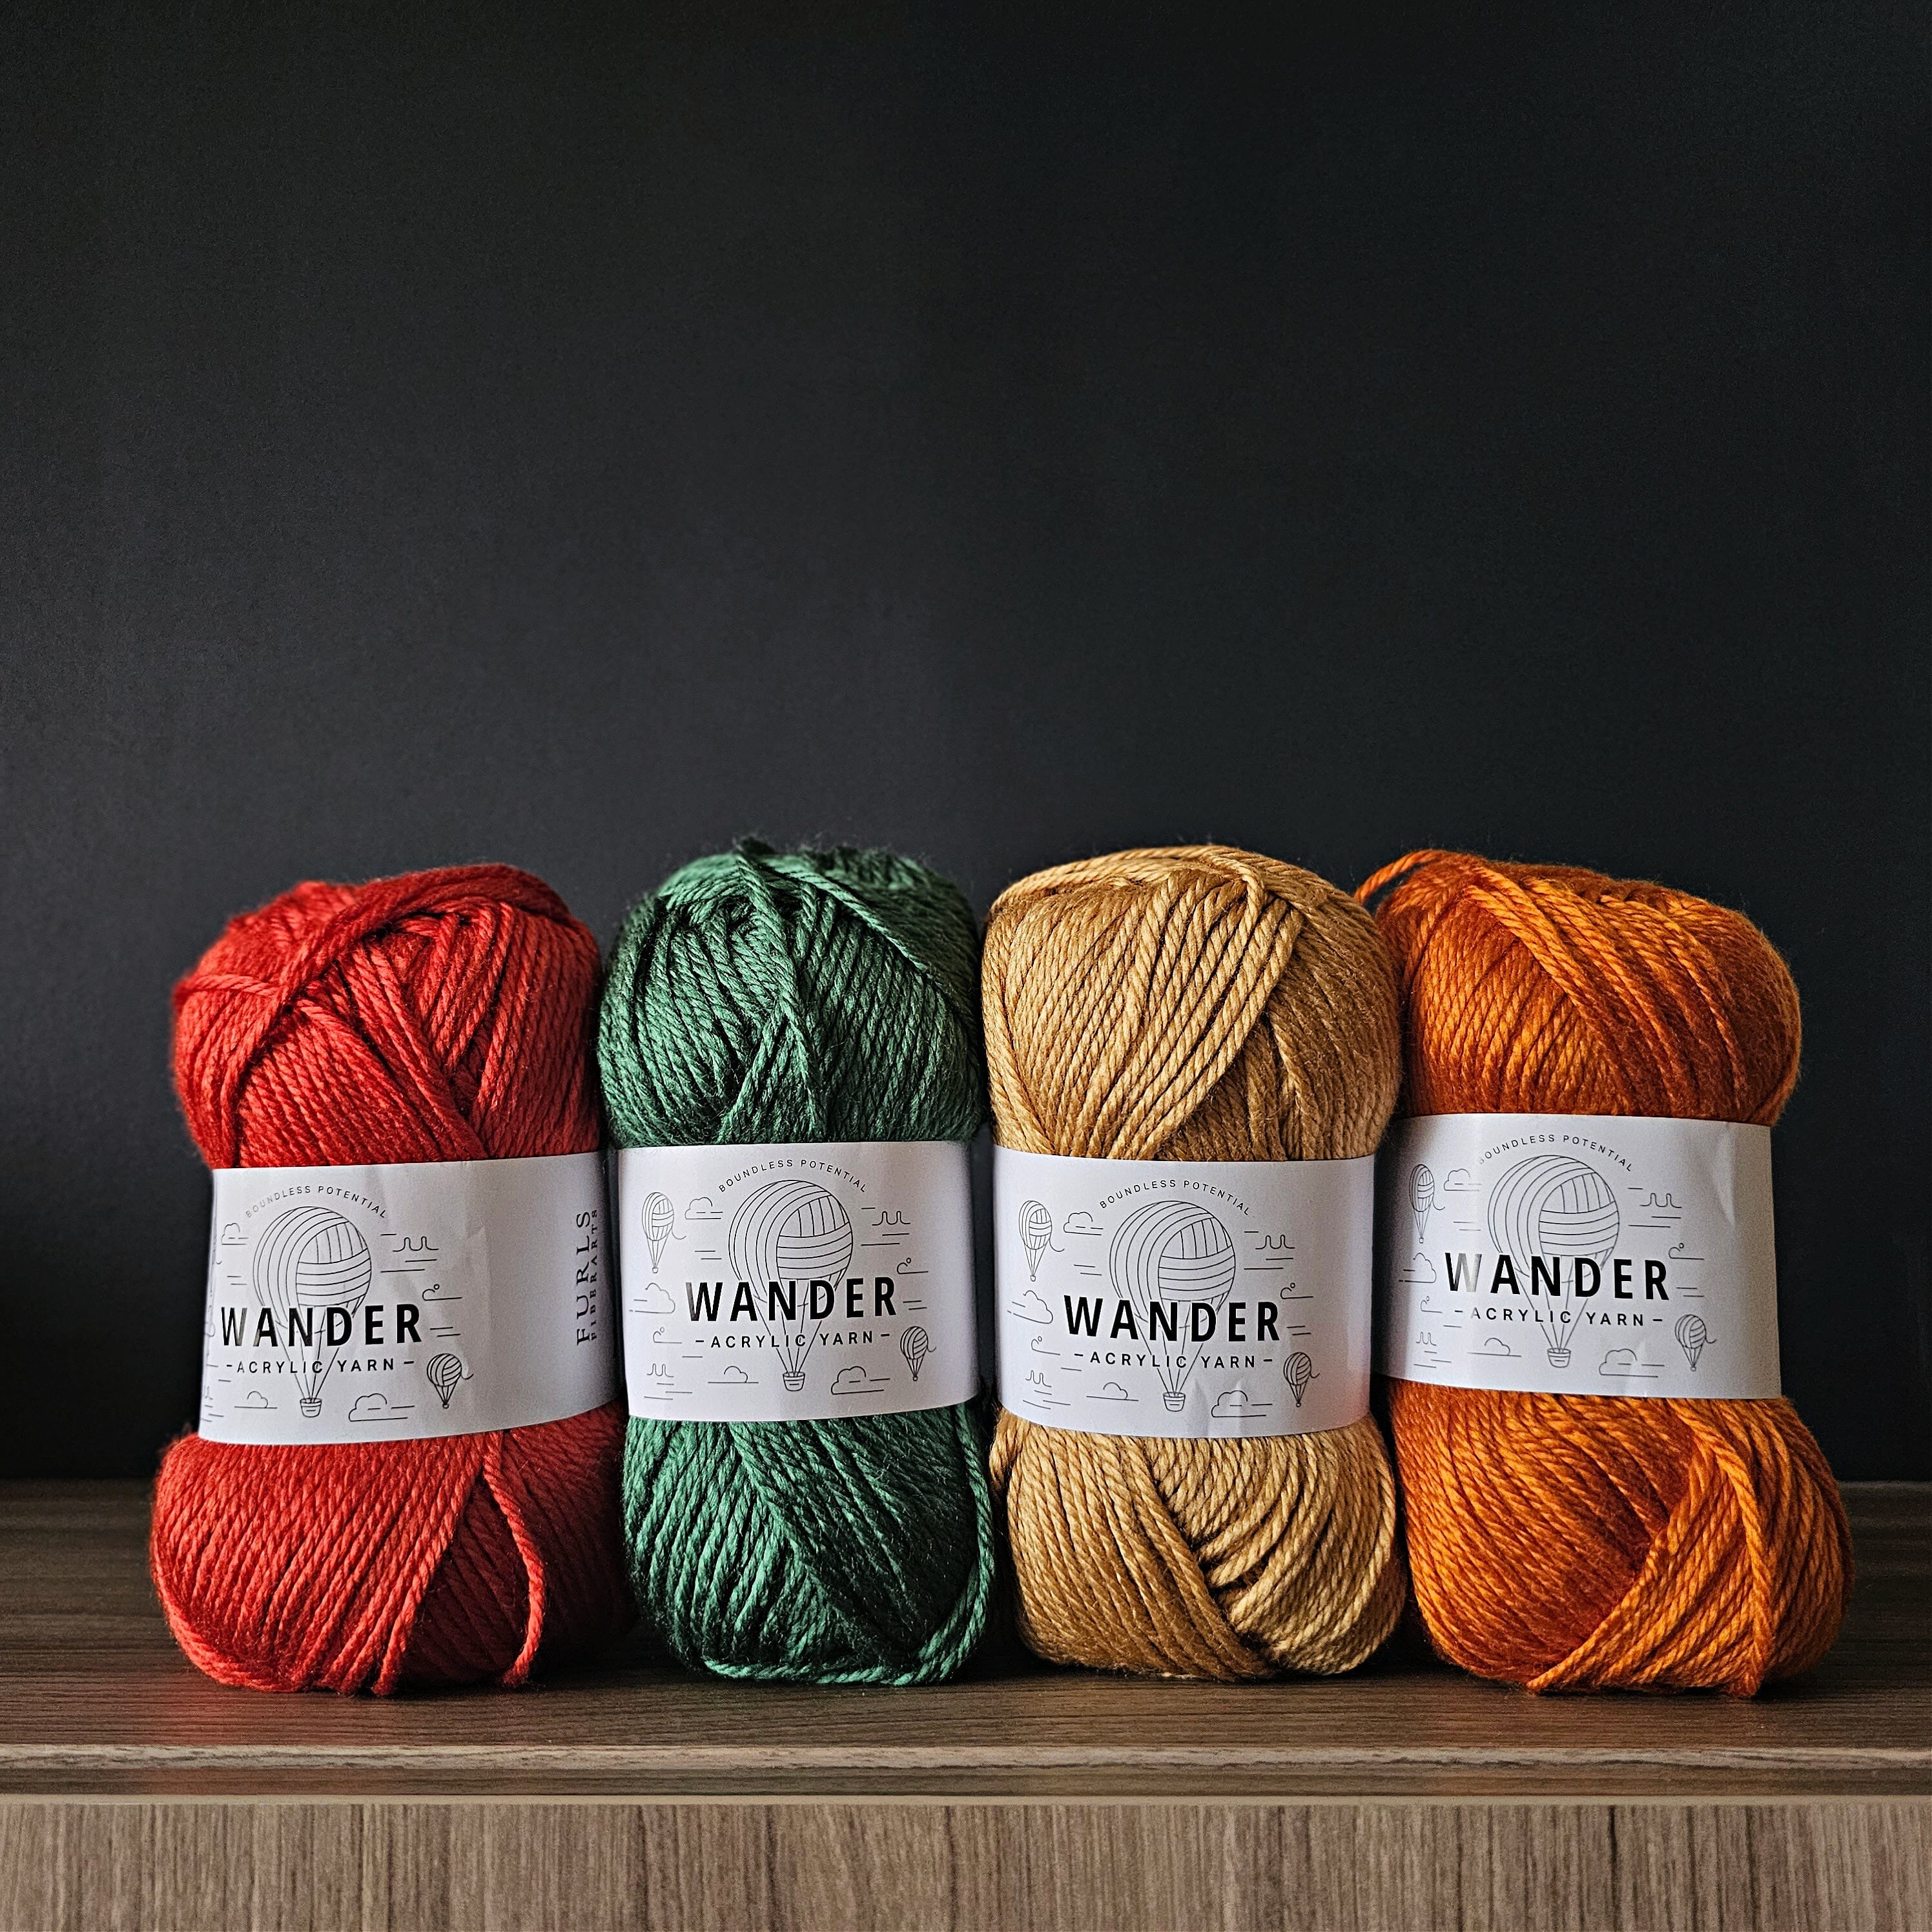
- Worsted weight yarn (4 ply) in black & white. (U.K. equivalent is Aran & AUS/NZ is 10 ply.)
- F (3.75 mm) crochet hook
- 15mm black safety eyes
- Fiberfill (or your stuffing of choice)
- Yarn needle
- Scissors
- Stitch marker
- Black felt
- Sewing needle & black sewing thread
PATTERN DETAILS
Finished size approximately
6.5 in. (16.5 cm.) tall
Abbreviation key (US terms)
sc - single crochet, st/sts - stitch(es), Sl st – slip stitch, Hdc – Half double crochet, Dc – Double crochet, dec - decrease (sc the next 2 stitches together), inc - increase (2 single crochet in the next stitch), R1 - round 1, Rep – repeat, BLO - , Back Loops Only, ** - repeat this group of instructions amount of times indicated
Note
All rounds are worked continuously (that is, vs. joined rounds.)
Color change help
Insert hook into last st of round or section, yarn over & pull hook through st. Take your new color of yarn, yarn over & pull hook through remaining 2 loops on hook. Now you’re ready to start the new round or section.
PART ONE
During part one, we will be working on the muzzle and head for the panda. Be sure and make the muzzle first so that you can make sure it fits in between the eyes as we’re making the head!
Muzzle (Using white yarn)
R1: Ch 7, starting in 2nd ch from hook, sc 6, turn and sc 6 in the front loops of the ch (12 sts)
(See pic. #1.) This is called a foundation chain and is a great way to start a piece that you want to be more oval than round. After crocheting through the top loops of the chain, you turn your work around and crochet in the bottom loops of the chain. The first round is complete! Now you just continue as you normally would.

R2: *Inc 1, sc 4, inc 1* rep 2 times (16 sts)
R3: Sc 1, inc 1, sc 4, *sc 1, inc 1* rep 2 times, sc 5, inc 1 (20 sts)
R4: Sc 2, inc 1, sc 4, *sc 2, inc 1* rep 2 times, sc 6, inc 1 (24 sts)
R5: Sc 3, inc 1, sc 4, *sc 3, inc 1* rep 2 times, sc 7, inc 1 (28 sts)
R6-7: Sc in all 28 sts (2 rounds total—28 sts)
Finish off leaving long tail for sewing. Take some black yarn and embroider a nose over the muzzle. (See pic. #2 to see exactly how I did mine.) Embroider the lines you see illustrated in red first. This will create a nice triangle. Now embroider the lines you see illustrated in black. Once you finish filling in the triangle, you may want to go over the sides and top again (that is the parts in red) with your yarn and needle to ensure no white is showing through. NOTE: Color differences are for illustration purposes only. The entire nose should be embroidered with black yarn.

Head (Using white yarn)
R1: Ch 2, 6 sc in 2nd ch from hook (you can use the magic circle if you prefer as it won’t make a difference in the end.)
R2: *Inc 1* rep 6 times (12 sts)
R3: *Sc 1, inc 1* rep 6 times (18 sts)
R4: *Sc 2, inc 1* rep 6 times (24 sts)
R5: *Sc 3, inc 1* rep 6 times (30 sts)
R6: *Sc 4, inc 1* rep 6 times (36 sts)
R7: *Sc 5, inc 1* rep 6 times (42 sts)
R8: *Sc 6, inc 1* rep 6 times (48 sts)
R9: *Sc 7, inc 1* rep 6 times (54 sts)
R10: *Sc 8, inc 1* rep 6 times (60 sts)
R11: *Sc 9, inc 1* rep 6 times (66 sts)
R12: *Sc 10, inc 1* rep 6 times (72 sts)
R13: *Sc 11, inc 1* rep 6 times (78 sts)
R14-24: Sc in all 78 sts (11 rounds total—78 sts)
R25: *Sc 1, inc 1* rep 6 times, sc 27, *sc 1, inc 1* rep 6 times, sc 27 (90 Sts)
R26: *Sc 2, inc 1* rep 6 times, sc 27, *sc 2, inc 1* rep 6 times, sc 27 (102 Sts)
R27-28: Sc in all 102 sts (2 rounds total—102 Sts)
R29: *Sc 2, dec 1* rep 6 times, sc 27, *sc 2, dec 1* rep 6 times, sc 27 (90 Sts)
R30: *Sc 1, dec 1* rep 6 times, sc 27, *sc 1, dec 1* rep 6 times, sc 27 (78 Sts)
R31: *Sc 11, dec 1* rep 6 times (72 sts)
R32: *Sc 10, dec 1* rep 6 times (66 sts)
R33: *Sc 9, dec 1* rep 6 times (60 sts)
R34: *Sc 8, dec 1* rep 6 times (54 sts)
R35: *Sc 7, dec 1* rep 6 times (48 sts)
R36: *Sc 6, dec 1* rep 6 times (42 sts)
Cut out two patches from your felt using the pattern provided on page 10. (See pic #3.)

Cut a small slit near the top half of both (the slightly bigger end is the top) and place the eyes in. Insert eyes between R27 & 28 about 18 sts apart. (Hint: insert the 1st eye. Count 18 sts from the hole where you inserted the 1st eye and insert the 2nd eye.) See pic. #5. Make sure they’re evenly space between the cheeks and make sure there is enough space for the muzzle to be sewn on between them.
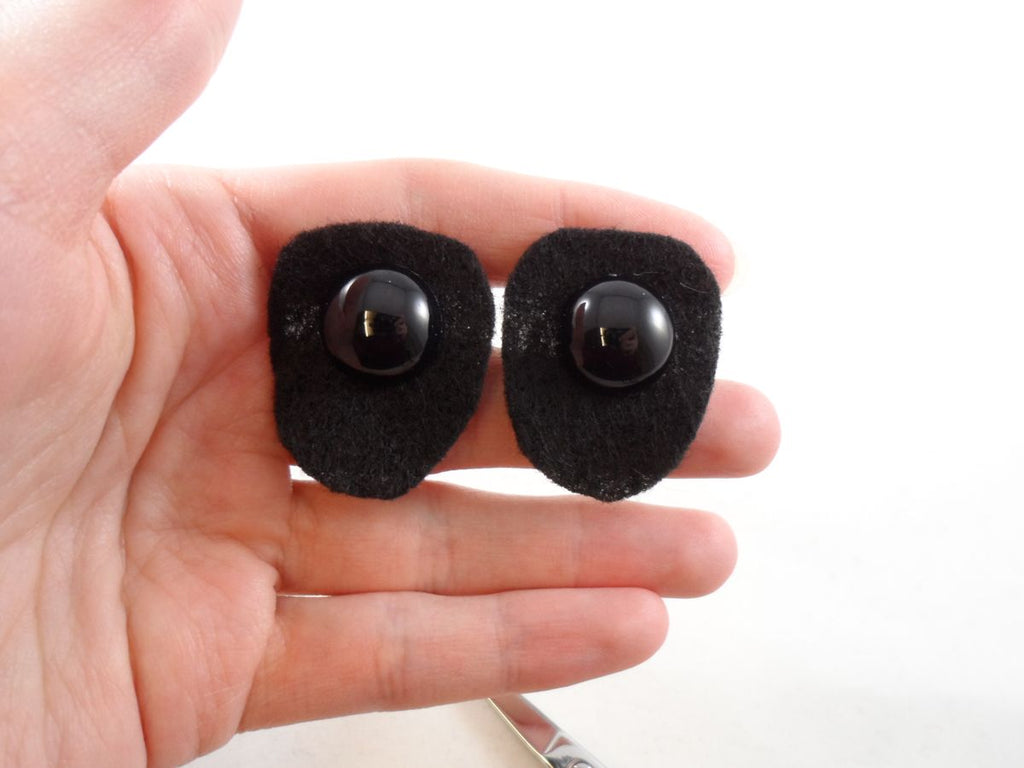

Do not attach the safety eye backings until you sew the felt in place. Neatly sew the patches down with your matching sewing thread. (Pic. #6) Now attach the eye backings.

R37: *Sc 5, dec 1* rep 6 times (36 sts)
R38: *Sc 4, dec 1* rep 6 times (30 sts)
Stop and start to stuff the head, continuing as you work. Make sure to stuff the cheeks firmly.
R39: *Sc 3, dec 1* rep 6 times (24 sts)
R40: *Sc 2, dec 1* rep 6 times (18 sts)
R41: *Sc 1, dec 1* rep 6 times (12 sts)
R42: *Dec 1* rep 6 times (6 sts)
Finish off. Finish stuffing head firmly, and use the tail to sew up hole, then weave in your end.

Now sew the finished muzzle to his head over R24-32, right between the eyes. Just before fully closing it up, stuff firmly. (See pic. #8.)

PART TWO
For part 2, we’ll be making our panda’s ears, and body.
Ears (Make 2 using black yarn)
R1: Ch 2, 6 sc in 2nd ch from hook
R2: *Inc 1* rep 6 times (12 sts)
R3: *Sc 1, inc 1* rep 6 times (18 sts)
R4: *Sc 2, inc 1* rep 6 times (24 sts)
R5-7: Sc in all 24 sts (3 rounds total—24 sts)
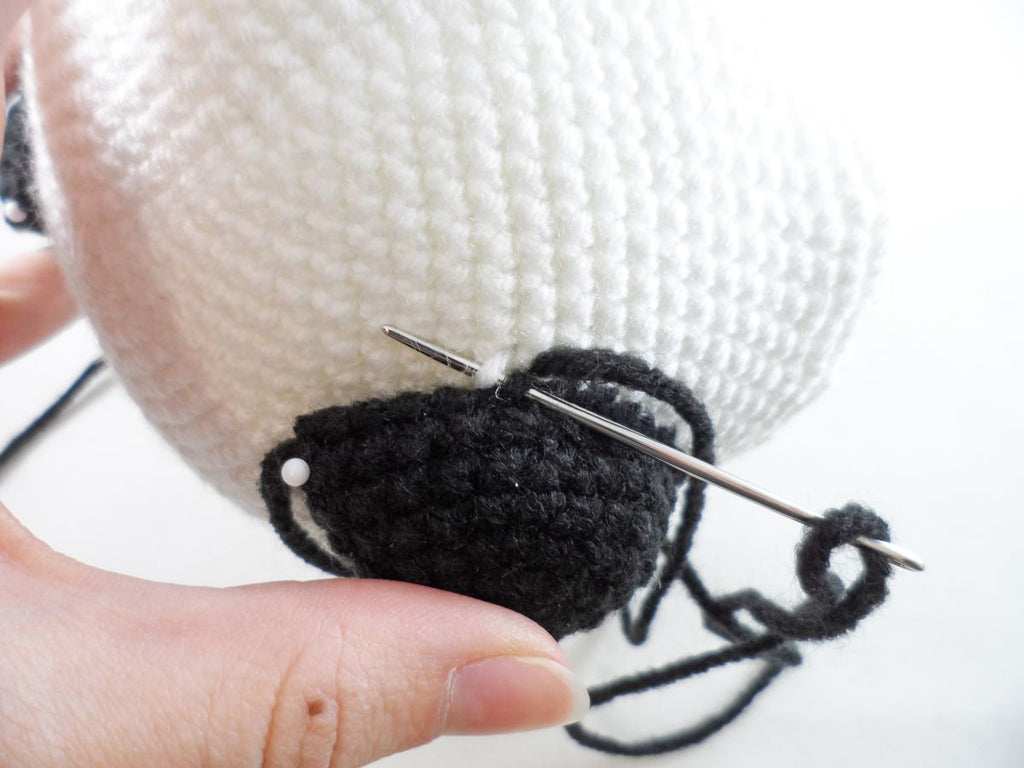
Finish off leaving long tail for sewing. Do not stuff. Sew the open ends together (see pic. #9) and sew to either side of the head over R10-20. Make sure to sew all the way around the ear, front and back. (See pics. #10 & #11.)


Body (Starting in white yarn)
R1: Ch 2, 6 sc in 2nd ch from hook
R2: *Inc 1* rep 6 times (12 sts)
R3: *Sc 1, inc 1* rep 6 times (18 sts)
R4: *Sc 2, inc 1* rep 6 times (24 sts)
R5: *Sc 3, inc 1* rep 6 times (30 sts)
R6: *Sc 4, inc 1* rep 6 times (36 sts)
R7: *Sc 5, inc 1* rep 6 times (42 sts)
R8: *Sc 6, inc 1* rep 6 times (48 sts)
R9-17: Sc in all 48 sts (9 rounds total—48 sts)
Switch to black yarn
R18a: Very loosely sl st in all 48 sts (48 sts)
R18: In BLO (back loops only of the sl sts) sc in all 48 sts (48 sts) (This is the only round we’ll crochet in the back loops.)
This is a special way of changing colors so that there is a neat, clean edge all around. The slip stitch round (R18a) is not adding any height to the round and is just the foundation for the next round (R18) so we get the clean edge from the bottom loops of the slip stitches. If you wish to do a traditional color change, then disregard R18a. (See pic. #12.)

R19-23: Sc in all 48 sts (5 rounds total—48 sts)
R24: *Sc 6, dec* rep 6 times (42 sts)
Finish off leaving long tail for sewing. Stuff firmly and sew to the head. (See pic. #13.)
PART THREE
For part 3, we’ll be completing our panda by making his arms, legs, and tail
Arms (Make 2 using black yarn)
R1: Ch 2, 6 sc in 2nd ch from hook
R2: *Inc* rep 6 times (12 sts)
R3: In BLO *Sc 2, dec* rep 3 times (9 sts)
R4-8: Sc in all 9 sts (5 rounds total—9 sts)
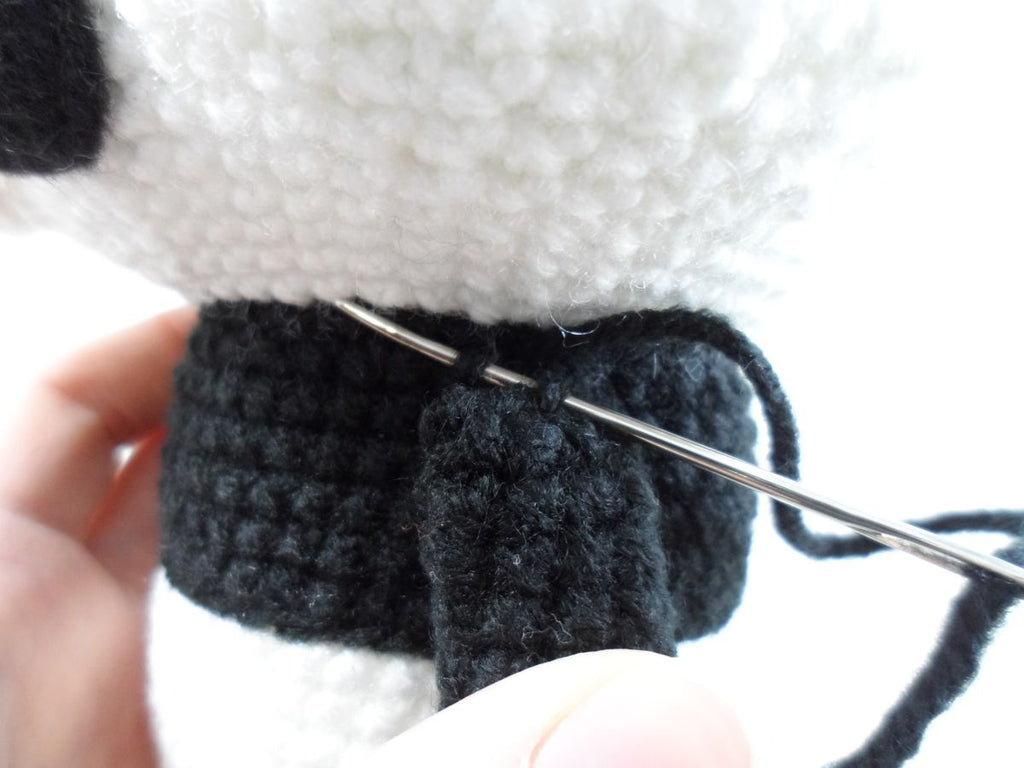
Finish off leaving long tail for sewing. Stuff very lightly and sew the open ends together as we did for the ears. Sew to the bottom of R24 of the body. (See pic. #14.)
Legs (Make 2 using black yarn)
R1: Ch 2, 6 sc in 2nd ch from hook
R2: *Inc* rep 6 times (12 sts)
R3: *Sc 1, inc* rep 6 times (18 sts)
R4: In BLO *Sc 1, dec* rep 6 times (12 sts) (This is the only round you will crochet in the back loops.)
R5-13: Sc in all 12 sts (9 rounds total—12 sts)
Finish off leaving long tail for sewing. Stuff and sew to the sides of the body over R7-13. (See pic. #15.)

Once you’ve sewn the legs on, weave the remaining tail to just under the side of the leg. Grab a stitch from the leg and tack it down to the side of the body so it’s not flopping around. (See pic. #16.)

Tail (using black yarn)
R1: Ch 2, 6 sc in 2nd ch from hook
R2: *Inc 1* rep 6 times (12 sts)
R3-4: Sc in all 12 sts (2 rounds total—12 sts)
Finish off leaving long tail for sewing. No need to stuff. Sew open ends closed and sew to the back of the body over R8. (See pics. #17 & #18.)


Congratulations, now you’re done! I hope you enjoyed making this cutie and I would love to see pictures of your finished panda! You can share pictures on:
Instagram: @storyland_amis
Facebook: Storyland Amis
Or email me: hello@storylandamis.com

