

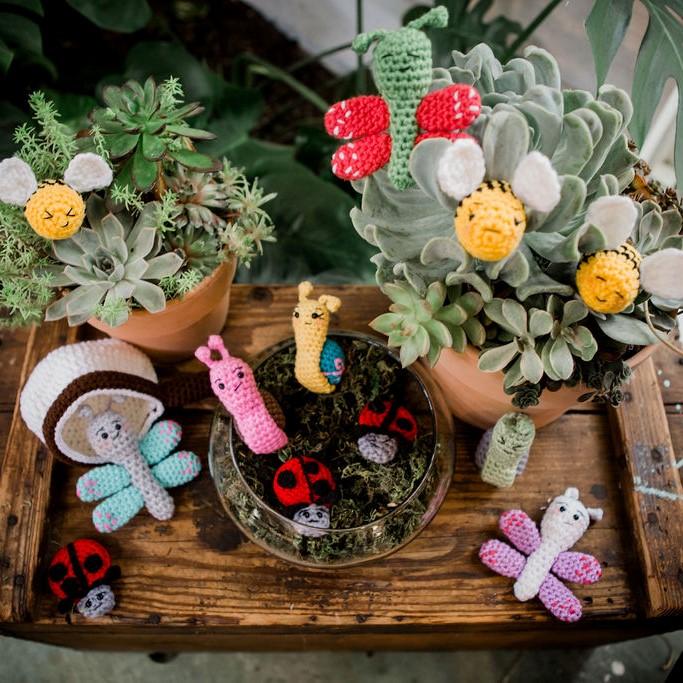
Get into the spirit of Spring with this Amigurumi Bug and Net Playset! This Amigurumi CAL will be broken up into two parts. This first part will contain the patterns for the ladybug, snail and butterfly! The second part will have the bumblebee and net patterns. 
ABOUT OUR DESIGNER
Jackie Laing is the designer behind A[mi]dorable Crochet. Jackie lives in northern B.C. At Mile Zero on the Alaska Highway, in Canada! With her daughter and furry family members! She has been playing with yarn and her favourite hooks, including her go to Odyssey hooks since 2009. Jackie enjoys making amigurumi and draws inspiration from her favourite music, movies and tv shows! And sharing her patterns for others to enjoy! You can find all of them HERE.

SUPPLIES
- 6mm safety eyes
- Red Heart Super Value Yarn - less than one skein per color
- Black thread for the eyebrows and mouth
- Furls Odyssey Crochet Hook size E/3.5mm
- Stuffing, scissors and a sewing needle
PATTERN DETAILS
Finished Sizes
Lady Bug: 3"
Butterfly: 4"
Snail: 3.5"
Bumblebee: 3.5"
Bug Net: 7"
Crochet Stitch Abbreviations
Ch-chain
Sc-single crochet
Inc- increase
Dec-decrease
Fo-fasten off

PART ONE
Get your Furls hook and some scrap yarn and lets get started on this fun Spring in spired Ami project!
Ladybug Body
Rnd1: With red yarn sc x 6 in a magic ring, or ch x 2 and do 6sc in the second chain from your hook (6)
Rnd2: Inc x 6 (12)
Rnd3: [Sc, inc] x 6 (18)
Rnd 4: Sc x 18 (18)
Rnd5: [Sc x 2, inc] x 6, fasten off (24)
Head
Rnd1: With grey yarn sc x 6 in a magic ring, or ch x 2 and do 6sc in the second chain from your hook (6)
Rnd2: Inc x 6 (12)
Rnd3: You will be inserting the safety eyes in the round. Sc x 6, place the first safety eye in the last stitch you just did, sc x 2, place your second safety eye in the last stitch you just did, sc x 4 (12)
Rnd4: Sc x 12, fasten off (12)
Dots
Rnd1: With black yarn sc x 6 in a magic ring, or ch x 2 and do 6sc in the second chain from your hook, fasten off (6)
Antenna (make 2)
Row1: With black yarn ch x 2 (2)
Row2: Turn, in the second chain from your hook do a puff stitch, then ch x 5, fasten off (6)
Line on the back of your ladybug shell
Row1: With black yarn ch x 12, fasten off (12)

Butterfly Body
Rnd1: With the colour of yarn of your choosing for your butterflies body sc x 6 in a magic ring, or ch x 2 and do 6sc in the second chain from your hook (6)
Rnd2: Inc x 6 (12)
Rnd3: [Sc, inc] x 6 (18)
Rnd4: Sc x 18 (18)
Rnd5: You will be adding the safety eyes in the round. Sc x 7, place your first safety eye in the last stitch you just did, dec, sc, place your second safety eye in the last stitch, sc x 6, dec (16)
Rnd6-8: Sc x 16 (16)
Rnd9: Dec x 8, stuff your butterflies body firmly (8)
Rnd10-19: Sc x 8 (8)
Rnd20: Dec x 4 closed, fasten off (4)
Wing (make 4)
Rnd1: With the colour of yarn of your choosing for your butterflies wing sc x 6 in a magic ring, or ch x 2 and do 6sc in the second chain from your hook (6)
Rnd2: [Inc, sc] x 3 (9)
Rnd3-8: Sc x 9 (9)
Rnd9: [Sc, dec] x 3, fasten off (6)
Antenna (make 2)
Row1: With the colour of your choosing for your butterflies antenna sc x 2 (2)
Row2: Turn, in the second chain from your hook do a puff stitch, then ch x 5, fasten off (6)

Snail Body
Rnd1: With the colour of yarn of your choosing for your snails body sc x 6 in a magic ring, or ch x 2 and do 6sc in the second chain from your hook (6)
Rnd2: Inc x 6 (12)
Rnd3: [Sc x 3, inc] x 3 (15)
Rnd4: Sc x 15 (15)
Rnd5: You will be placing the safety eyes in the round, sc x 6, place your first safety eye in the last stitch you just did, sc x 3, place your second safety eye in the last stitch you just did, sc x 6 (15)
Rnd6: Sc x 15 (15)
Rnd7: [Sc x 3, dec] x 3 (12)
Rnd8-9: Sc x 12 (12)
Rnd10: [Sc x 2, dec] x 3 (9)
Rnd11-19: Sc x 9 (9)
Rnd20: Sc, [sc x 2, dec] x 2, stuff your snails body firmly (7)
Rnd21-22: Sc x 7 (7)
Rnd23: Dec x 3 closed, fasten off (3)
Snail Shell
Rnd1: With the colour of yarn of your choosing for your snails shell sc x 6 in a magic ring, or ch x 2 and do 6sc in the second chain from your hook (6)
Rnd2: Inc x 6 (12)
Rnd3: [Sc, inc] x 6 (18)
Rnd4-9: Sc x 18 (18)
Rnd10: Dec x 9, stuff your snails body firmly (9)
Rnd11: Dec x 4 closed, fasten off (4)
Antenna (make 2)
Row1: With the colour of your choosing for your snails antenna sc x 2 (2)
Row2: Turn, in the second chain from your hook do a puff stitch, then ch x 5, fasten off (6)
Assembly
To assemble your ladybug sew the dots onto your ladybugs back and the line, then sew the head onto the body and the antenna on your ladybug. Sew the antenna on your butterfly. Then sew on the wings. Flatten the body of your snail, stuff the snail shell and sew it in place on the body. Sew on the eyebrows and mouth on all of your insects. Now enjoy your new little insect friends!

PART TWO
It's time to complete the set by making the bumble bee and bug net. Let's get to it.
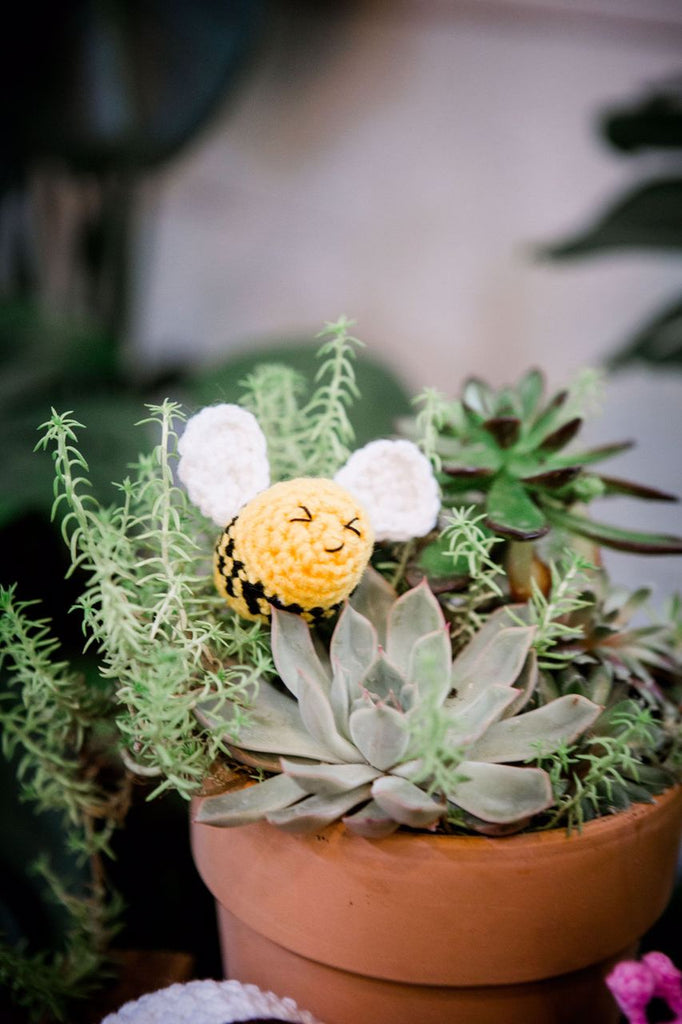
Bumble Bee
Rnd1: With yellow yarn sc x 6 in a magic ring, or ch x 2 and do 6sc in the second chain from your hook (6)
Rnd2: Inc x 6 (12)
Rnd3: You will be adding the safety eyes in this round, sc x 4, place your first safety eye in the last stitch you just did, sc x 4, place your second safety eye in the last stitch, sc x 4 (12)
Rnd4: [Sc, inc ] x 6 (18)
Rnd5-6: Sc x 18 (18)
Rnd7: Change to black yarn sc x 18 (18)
Rnd8: Change to yellow yarn sc x 18 (18)
Rnd9: Change to black yarn sc x 18 (18)
Rnd10: Change to yellow yarn sc x 18 (18)
Rnd11: [Sc x 4, dec] x 3 (15)
Rnd12: Sc x 15 (15)
Rnd13: Dec x 3, sc x 7 (10)
Rnd14: Stuff your bumble bee firmly, and dec x 5 closed (5)

Wing (make 2)
Row1: With white yarn ch x 2 (2)
Row2-3: Turn, ch, sc x 2 (2)
Row4: Turn, ch, inc x 2 (4)
Rnd6: Do not turn, Sc x 12 around the entire wing, fasten off
Bug Net
Rnd1: Starting at the base of the bug net, with white yarn sc x 6 in a magic ring, or ch x 2 and do 6sc in the second chain from your hook (6)
Rnd2: Inc x 6 (12)
Rnd3: [Hdc, hdc x 2 in next st] x 6 (18)
Rnd4: [Hdc, hdc x 2 in next st] x 9 (27)
Rnd5: [Hdc x 2, hdc x 2 in next st] x 9 (36)
Rnd6: [Hdc, hdc x 2 in next st] x 18 (54)
Rnd7-8: Hdc x 54 (54)
Rnd9: [Hdc x 25, hdc x 2 in next st] x 2 (52)
Rnd10-12: Hdc x 52 fasten off at the end of Rnd12 (52)

Brown Trim on the bug net
Rnd1: Insert your hook into any post in the last round on the net (rnd12), and sc x 50 around the net (50)
Rnd2-4 Dc x 50, fasten off at the end of Rnd4 (50)
Handle
Rnd1: Starting at the base of the handle, with brown yarn sc x 6 in a magic ring, or ch x 2 and do 6sc in the second chain from your hook (6)
Rnd2: Inc x 6 (12)
Rnd 3-5: Sc x 12 (12)
Rnd6: [Sc x 4, dec] x 2 (10)
Rnd7-22: Sc x 10, fasten off at the end of Rnd22 (10)

Assembly
To assemble your bumblebee sew the wings in place. I use dress making pins to hold pieces in place on my amigurumi while I sew them on. Sew the handle onto your bug net. Weave in all ends and trim them.
Looking for more Ami patterns? Check out our past crochet-a-longs here.


