

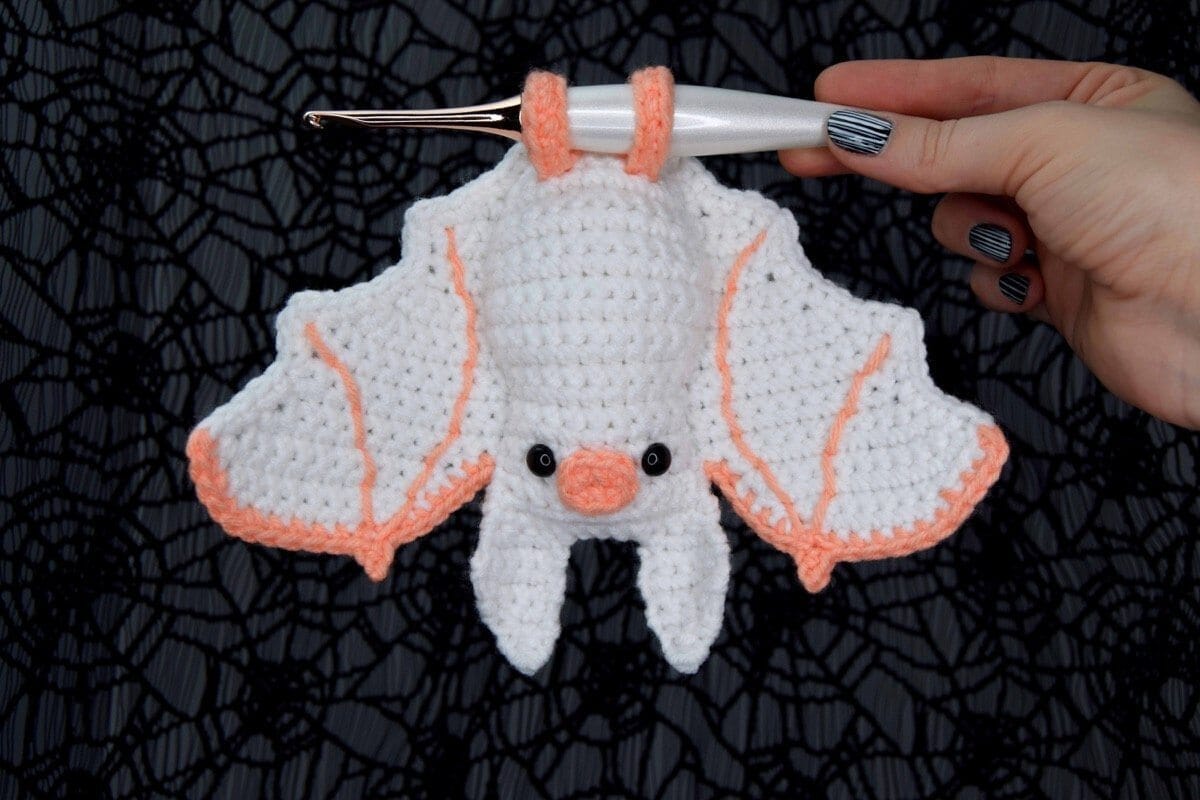
Learn how to make an adorable crochet bat with this free amigurumi pattern: Batty Batty Bats!
Updated: 5/21/2024
Spooky season is upon us! But despite the fangs, there’s no need to fear these little dears. Did you know that bats are pollinators? If you love avocados, mangos, vanilla, coconut, and bananas, you have bats to thank. Bats also help spread seeds for nuts and cacao (chocolate!) – so your Halloween haul this year was brought to you, in part, by bats! This month we’re batty about these tiny flying mammals, so let’s echolocate our hooks ‘n’ yarn and make some adorable ami bats together!

Add this pattern to Ravelry | Join our CAL group on Facebook
ABOUT OUR DESIGNER
Brenna Eaves is the one-woman team behind Little Raven Fiber Arts. A self-taught fiber artist with more than 13 years’ experience building things with stitches, she has the type of yarn stash that, if unraveled and tied end to end, would stretch to the moon and back. Though also an accomplished knitter, cross-stitcher, writer, artist, and graphic designer, crochet is her happy place. She lives and works out of Wisconsin.
Facebook / Instagram / Tumblr / Ravelry / Twitter

SUPPLIES
- Furls Wander Worsted weight yarn in black / purple, white / pink, or light grey / dark grey
- Black, white, or grey fluffy yarn (optional)
- 5.0mm (H) & 4.0mm (G) Furls Streamline Metal crochet hooks
- Scrap white yarn for teeth (optional)
- 9mm black safety eyes
- Stuffing
- Two lengths of scrap yarn
- Tapestry needle

PATTERN DETAILS
Dimensions
~9.5” wingspan, ~6.5” tall
Notes
- The bat front and back are worked flat and then sandwiched together with stuffing between. The back includes the wings but not the ears, the front includes the ears and not the wings.
- Do not chain 1 when turning.
PART ONE
This week we’ll be making the back of the bat, which includes the wings.
Body and wings (back)
With main body color and H hook, ch 5
Row 1: 2 sc in 2nd ch from hook, sc dec, 2 sc in last ch, TURN (5)
Row 2: 2 sc in 1st sc, sc dec, sc in next sc, 2 sc in last sc, TURN (6)
Row 3: 2 sc in 1st sc, sc in next 4 sc, 2 sc in last sc, TURN (8)
Row 4: Sc in each sc across, TURN (8)
Row 5: 3 sc in 1st sc, sc in next 6 sc, 3 sc in last sc, ch 2 TURN (12)
Row 6: Sc in 2nd ch from hook, sc in next 12 sc, ch 2, TURN (13)
Row 7: 3 sc in 2nd ch from hook, sc in next 12 sc, 3 sc in last sc, TURN (18)
Row 8: 2 sc in 1st sc, sc in next 16 sc, 2 sc in last sc, TURN (20)
Row 9: Slp st in 1st sc, sc in next 18 sc, TURN leaving last sc unworked (19)
Row 10: Sc in each sc across, skip slp st, TURN (18)
Row 11: 3 sc in 1st sc, sc in next 16 sc, 3 sc in last sc, TURN (22)
Row 12: Sc in each sc across, TURN (22)
Row 13: 3 sc in 1st sc, sc in next 20 sc, 3 sc in last sc, TURN (26)
Row 14: Sc in each sc across, TURN (26)
Row 15: 2 sc in 1st sc, sc in next 24 sc, 2 sc in last sc, TURN (28)
Row 16: 3 sc in 1st sc, sc in next 26 sc, 3 sc in last sc, TURN (32)
Row 17: Slp st in 1st 2 sc, sc in next 28 sc, TURN leaving last 2 sc unworked (30)
Row 18: 2 sc in 1st sc, sc in next 27 sc, skip last slp sts, TURN (29)
Row 19: 2 sc in 1st sc, sc in next 28 sc, TURN (30)
The next row will start a series of three separate sections, beginning the wing / head / wing divide.
Row 20a. 3 sc in 1st sc, sc in next 7 sc, sc dec, TURN (11)
Row 21a. Sc in each sc across, TURN (11)
Row 22a. 3 sc in 1st sc, sc in next 8 sc, sc dec, TURN (12)
Row 23a. Sc in 1st 9 sc, slp st in next sc, TURN leaving last 2 sc unworked (10)
Row 24a. Sk slip st, sc in next 6 sc, sc dec, slp st in last sc
FO, weave in this end.


HEAD
Make a slipknot and place it on the (H) hook, reattach with a sc in the next sc of row 20.
Row 20b. Sc in next 10 sc, TURN (10)
Row 21b. 2 sc in 1st sc, sc in next 8 sc, 2 sc in last sc, TURN (12)
Row 22b. Sc in each sc across, TURN (12)
FO leaving a relatively long tail for assembly: you’ll use this to sew the front onto the back piece. Weave in the first end only.
SECOND WING
Make a slipknot and place it on the (H) hook, reattach with a sc in the next sc of row 20.
Row 20c. Sc dec, sc in next 7 sc, 3 sc in last sc, TURN (11)
Row 21c. Sc in each sc across, TURN (11)
Row 22c. Sc dec, sc in next 8 sc, 3 sc in last sc, TURN (12)
Row 23c. Slp st in 1st 2 sc, sc in next 8 sc, sc dec, TURN (12)
Row 24c. Sc dec, sc in next 6 sc, slp st in next sc
FO and weave in the ends.
With two lengths of scrap yarn and a tapestry/yarn needle, outline a pear-shaped body onto the flat bat. We’ll sew the front on later following these guides.

Join us in the next part of the pattern, when we’ll make the front piece, a face, some feet, and then bring it all together to finish our bats!

PART TWO
This week we’ll finish our bats with the front piece of the body, the face, a lovely finished edge and stitched detail on the wings, and then finally, we’ll give them feets!
Body (front)
With main color and size H hook, ch 9
Row 1: 2 sc in 2nd ch from hook, sc in next ch, [sc dec] 2x, sc in next ch, 2 sc in last ch, TURN (8)
Row 2: 2 sc in 1st sc, sc in next 6 sc, 2 sc in last sc, TURN (10)
Row 3: Sc in each sc across, TURN (10)
Row 4: 2 sc in 1st sc, sc in next 8 sc, 2 sc in last sc, TURN (12)
Row 5: Sc in each sc across, TURN (12)
Row 6: 2 sc in 1st sc, sc in next 10 sc, 2 sc in last sc, TURN (14)
Rows 7-10. Sc in each sc across, TURN (14)
NOTE: If adding a fluffy chest to your bat like my little grey goober, work rows 10-14 in fluffy yarn.
Row 11. Sc dec, sc in next 10 sc, sc dec, TURN (12)
Row 12. Sc dec, sc in next 8 sc, sc dec, TURN (10)
Rows 13-17. Sc in each sc across, TURN (10)
Row 18. 2 sc in 1st sc, sc in last 9 sc, TURN (11)
Row 19. 2 sc in 1st sc, sc in last 10 sc, TURN (12)
Row 20. Sc in each sc across, TURN (12)
Row 21a. 2 sc in 1st sc, sc in next 3 sc, TURN leaving last 8 sc unworked (5) [ear started]
Rows 22a-23a. Sc in each sc across, TURN (5)
Row 24a. Sc in 1st 3 sc, sc dec, TURN (4)
Row 25a. Sc dec, sc in last 2 sc, TURN (3)
Row 26a. Sc in 1st sc, sc dec, TURN (2)
Row 27a. Sc dec
FO, weave in this end
Make a slipknot, skip next 4 sc of row 20, reattach yarn to work as follows:
Row 21b. Sc in next 3 sc of row 20, 2 sc in last sc, TURN (5)
Rows 22b-23b. Sc in each sc across, TURN (5)
Row 24b. Sc dec, sc in last 3 sc, TURN (4)
Row 25b. Sc in 1st 2 sc, sc dec, TURN (3)
Row 26b. Sc dec, sc in last sc, TURN (2)
Row 27b. Sc dec
FO, weave in the ear ends
Feeties (make 2)
With either main color or second color (your choice) and size H hook, ch 11 (or however long the chain needs to be to fit onto your finger) and join with slp st to form a ring (be careful not to twist stitches).
Rnd 1: Sc in each ch around (10)
FO leaving a medium tail for assembly.
Nose
With second color and G hook, ch 3
Rnd 1: 2 sc in 2nd ch from hook, 4 sc in last ch, turning your work so you’re working along the underside of the ch, 2 sc in same ch space as 1st 2 sc (8)
FO leaving a medium tail for assembly.
Put the snap-in eyes between rows 17-18 of the body front, about 2 or 3 sc from the edge. There are 5 sc stitches between when I place my safety eyes. Before snapping them in, make sure the nose will fit between them.
Sew the nose over rows 17-19, centered on the face and slightly higher than the eyes. Weave in end.
If adding teeth: with scrap white yarn, stitch two small, tight v’s directly under the nose. You can tie off the ends at the back.

FINISHING
Weave the long tail end of the back piece down along the side of the head so it starts at the “shoulder” where the wing and head split off.
Match the front piece to the back piece at the top head. Row 20 of the front piece should match up with Row 22b of the back piece. You can place a pin between the ears to help keep everything lined up while starting to sew the head together.
Whipstitch the head area together: stop when you reach the other “shoulder”.

With second color and H hook, make a slipknot and attach with a sc at the first “shoulder” (where we started sewing the head). Working along the top of the wing, *sc as evenly as possible across until you reach the apex of the wing (this was about 7 sc for me): ch 3, slp st in 2nd ch from hook, sc in last ch, then sc in next available space* (which is likely the next sc of row 24c of the wing). Continue to work sc as evenly as possible across the top of the wing (I fit about 11 more sc) until you reach the wingtip: work 2 or 3 sc into one space at the very tip of the wingtip, then COLOR CHANGE to main body color.
Work sc as evenly as possible along the scalloped edge of the wing. At each scallop tip, work [sc, ch 1, sc] to help accentuate the point. Continue this around the tail and across the scallops of the other wing. When you reach the other wingtip, COLOR CHANGE to second color again and work 2 or 3 sc into the very tip of the wingtip. Rep *-* as you did for the first wing (NOTE: we’re going from wingtip to shoulder now, so it’ll be about 11 sc to the apex, then about 7 sc to the shoulder, a mirror to the other wing).
FO and weave in ends from the edging (not the end used to whipstitch the head together). You can loosely tie the beginning and FO tails together so they’re between the front and back pieces of the bat.


Again using the end we used to whipstitch the head together, continue to stitch the front of the bat to the back piece, following the pear-shaped guides we established earlier with scrap yarn. About an inch and a half from closing up, add stuffing to the head and body of the bat, then stitch closed and weave in the end. Remove the scrap yarn guides.
With two lengths of your second color, add the stitched wing detail as pictured: from the little wing thumb down to each scallop of the wings. Weave in ends.
Last bit! Securely sew the foot loopies to the first few rows of the body front, down by the tail. Weave in all remaining ends.
That’s it! Make a whole colony to decorate your home this spooky season, and HAPPY HALLOWEEN from all of us at Furls Crochet!


