

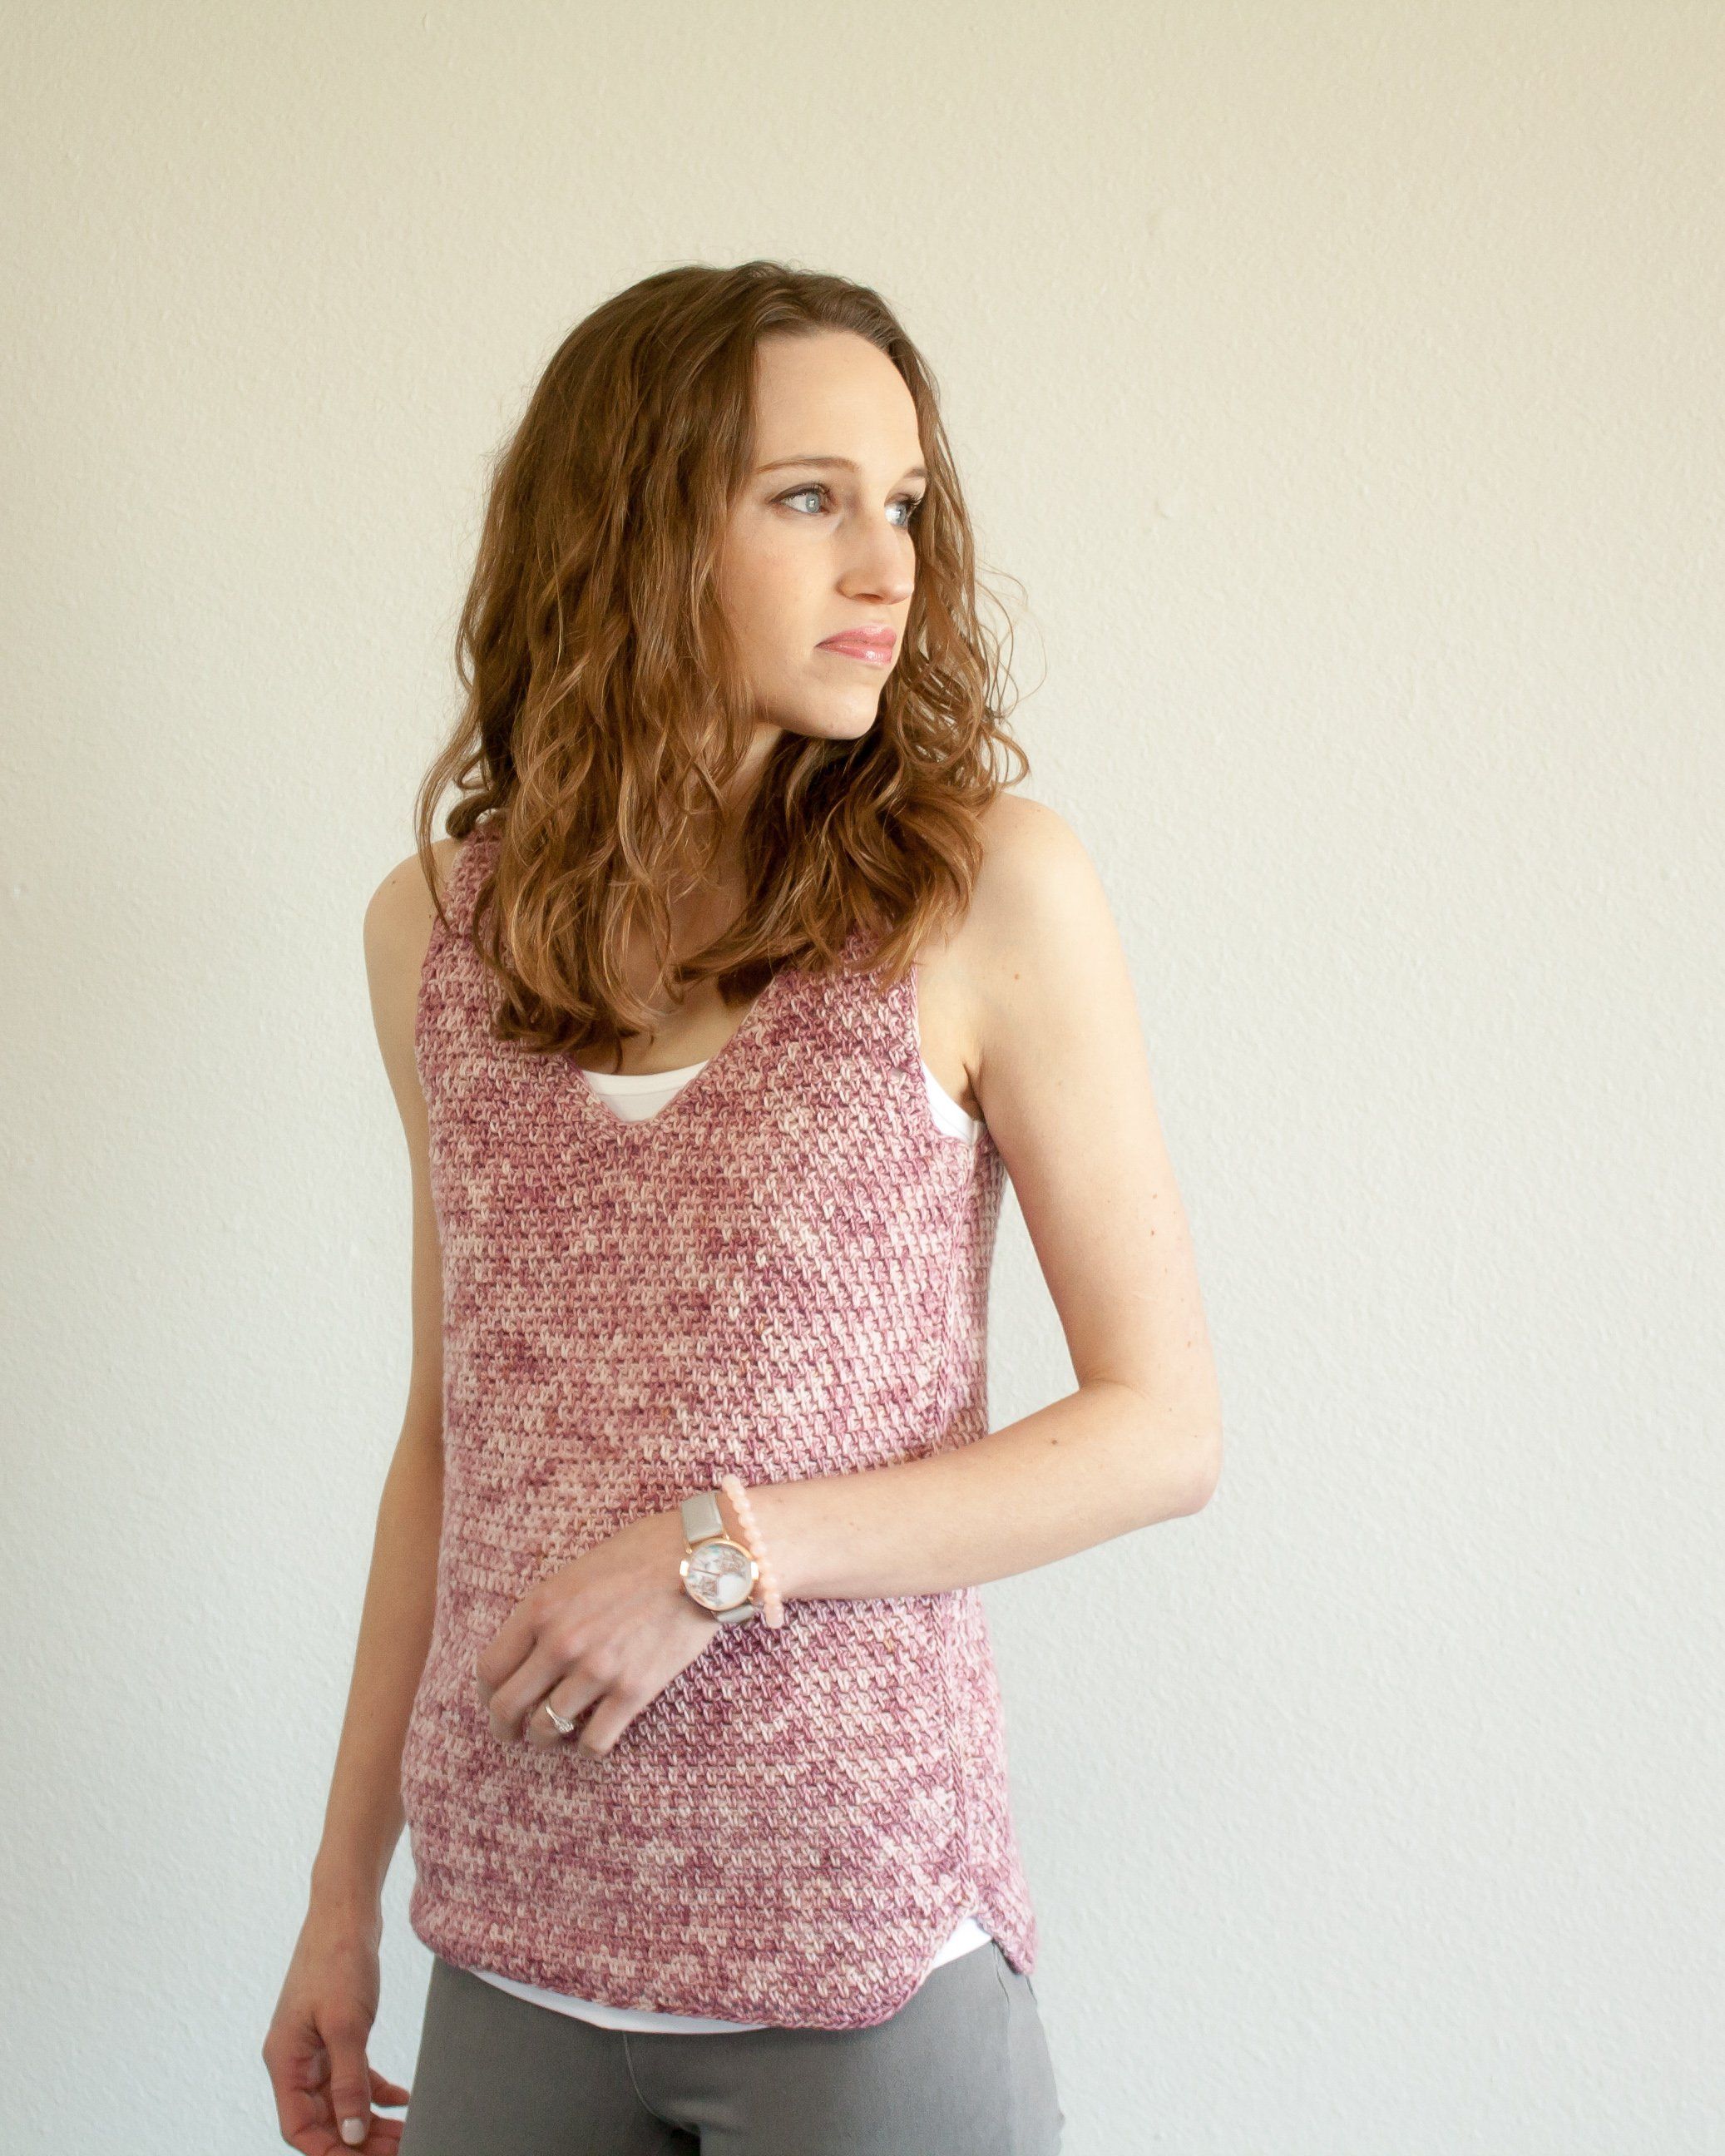
The Tilley Tank is an easy everyday tank top you'll love to wear all Summer! This V-neck tank with a split hem is worked in two pieces using basic stitches. If you're afraid of seaming, not to worry! A slip stitch decorative seam makes it a breeze even for beginners.
 add this pattern to your Ravelry favorites
ABOUT OUR DESIGNER
Katy is the crochet designer and yarn dyer behind KT and the Squid. She taught herself to knit and crochet in high school and started designing in 2011. Her favorite things to make include garments and shawls for women. Her style is contemporary, lightweight and simple.
Katy is normally a quiet person but if you get her talking about yarn, knit or crochet you’ll never get her to stop. Stay connected with Katy....

SUPPLIES
Yarn
Furls Whims Merino DK (50% superwash merino/50% nylon; 196 yds; DK weight) 5 (5, 6, 6, 7, 8, 8, 9) skeins- sample shown features Hand Dyed Whims Merino Yarn by Katy in the colorway Bloom (sold out).

LIMITED TIME SPECIAL
The yarn shown in this sample is custom-dyed by Katy. We have four amazing colors available. Purchase 4 or more skeins and get our latest ebook, with four modern and stylish tanks designed by Katy and Lorene Eppolite of Cre8tion Crochet. All four patterns come in sizes Small - 5x. (see bottom of post for all four designs)
Hook
H/5.0 mm hook (or hook to obtain gauge)
PATTERN DETAILS
Sizes
S (M, L, 1X, 2X, 3X, 4X, 5X)
To fit a bust of: 30 (34, 38, 42, 46, 50, 54, 58)”
Finished bust: 32 (36, 40, 44, 48, 52, 56, 60)”
The sample is shown in size S on a model with a 31” bust.

Abbreviations
Ch = chain
St(s) = stitch(es)
Sc = single crochet
Notes
- The Tilley Tank is worked from the bottom up in 2 separate pieces.
- You may use any DK weight yarn. Be sure to check your gauge.
Gauge (save time and check your gauge!)
21 sts by 19 rows = 4” square (gauge is measured after blocking)
Gauge Pattern (Linen Stitch)
Chain an odd number
Row 1: sc in the 2nd ch from hook, *ch 1, skip 1 ch, sc in the next ch; repeat from * until 1 ch remains, sc in the last ch.
Row 2: ch 1, turn, sc in the 1st, *ch 1, sc in the next ch-1 space; repeat from * to the last ch-1 space, sc in the last sc.
Repeat row 2 to desired length
PART ONE
Hey friends! Grab your yarn and your favorite Furls hook. This week we'll be making the back of the Tilley Tank. The back is made flat in 3 sections. First you'll decrease for the split hem, work the rest of the bottom then the arm hole opening. This part is fairly large but should work up fast since the stitches are so simple. If you are using Whims hand-painted please be sure to alternate skeins every few rows.
Back
Body
Ch 68 (78, 90, 100, 112, 122, 134, 142)
Row 1: Sc in the 2nd ch from hook, *ch 1, skip 1, sc in the next ch; repeat from * across. 67 (77, 89, 99, 111, 121, 133, 141)
Row 2: Ch 1, turn, sc in the 1st st, *ch 1, sc in the next ch-1 space; repeat from * until 1 st remains, ch 1, sc in the last st. 69 (79, 91, 101, 113, 123, 135, 143)
Repeat row 2 until you have 9 total rows. Each repeat of row 2 will add 2 sts. You will end with 83 (93, 105, 115, 127, 137, 149, 157) sts
Row 10: Ch 1, turn, sc in the 1st st, *sc in the next ch-1 space, ch 1; repeat from * until 3 sts remain, sc in the last ch-1 space, sc in the last sc. 83 (93, 105, 115, 127, 137, 149, 157)
Place a st marker on the first and last st of row 10. This will mark where to start your side seams.
Row 11: Ch 1, turn, sc in the 1st st, *ch 1, sc in the next ch-1 space; repeat from * until 2 sts remain, ch 1, skip 1, sc in the last. 83 (93, 105, 115, 127, 137, 149, 157)
Repeat rows 10 and 11 until you have 75 total rows.
Armhole Shaping
Row 1: Ch 1, turn, slip st in the 1st 6 (6, 6, 6, 6, 6, 8, 10) sts, ch 1, sc in the same st, *ch 1, sc in the next ch-1 space; repeat from * until 5 sts remain, leave the last 5 sts unworked. 73 (83, 95, 105, 117, 127, 135, 139) plus the 6 (6, 6, 6, 6, 6, 8, 10) slip sts
Place a stitch marker to mark row 1. This will mark where to start counting your rows.
Row 2: Ch 1, turn, sc in the 1st st, skip the next 2 sts, *ch 1, sc in the next ch-1 space; repeat from * until 3 sts remain, ch 1, skip 2, sc in the last. 71 (81, 93, 103, 115, 125, 133, 137)
Repeat row 2 until you have 6 (12, 16, 21, 24, 28, 30, 30) rows. Start counting from the marked row. Each row will decrease by 2 sts. You will end with 63 (63, 65, 65, 71, 73, 77, 81) sts
Armhole Length
Row 7 (13, 17, 22, 25, 29, 31, 31): Ch 1, turn, sc in the 1st st, *sc in the next ch-1 space, ch 1; repeat from * until 3 sts remain, sc in the last ch-1 space, sc in the last sc. 63 (63, 65, 65, 71, 73, 77, 81)
Row 8 (14, 18, 23, 26, 30, 32, 32): Ch 1, turn, sc in the 1st st, *ch 1, sc in the next ch-1 space; repeat from * until 2 sts remain, ch 1 skip 1, sc in the last. 63 (63, 65, 65, 71, 73, 77, 81)
Repeat the last 2 rows until you have 30 (32, 34, 38, 40, 42, 44, 46) rows.
Repeat row 7 (13, 17, 22, 25, 29, 31, 31) one more time
Fasten off.
This completes the back of your Tilley Tank. Next week we will make the front panel, then on to assembly and finishing for week three.
PART TWO
Front
Body
Repeat the body of the back.
Split for the Neck
Armhole/Neck Shaping
Row 1: Ch 1, turn, slip st in the 1st 6, ch 1, sc in the same st, *ch 1, sc in the next ch-1 space; repeat from * until you have 35 (41, 47, 51, 57, 63, 67, 69) total sts (not counting the 6 slip sts)
Place a stitch marker to mark row 1.
Row 2: Ch 1, turn, sc in the 1st st, skip the next 2 sts, *ch 1, sc in the next ch-1 space; repeat from * until 3 sts remain, ch 1, skip 2, sc in the last. 33 (39, 45, 49, 55, 61, 65, 67)
Repeat row 2 until you have 6 (12, 16, 22, 24, 28, 30, 30) rows. Start counting from the marked row. Each row will decrease 2 sts. You will end with 25 (19, 17, 11, 9, 9, 11) sts
Neck Shaping/Armhole Length
Sizes S, M, L, 1X, and 2X only
Row 7 (13, 17, 23, 25, --, --, --): Ch 1, turn, sc in the 1st st, *sc in the next ch-1 space, ch 1; repeat from * until 3 sts remain, skip 2, sc in the last sc. 24 (18, 16, 10, 10, --, --, --)
Row 8 (13, 18, 23, 26, --, --, --): Ch 1, turn, sc in the 1st st, skip 2, *ch 1, sc in the next ch-1 space; repeat from * until 2 sts remain, ch 1, sc in the last. 23 (18, 15, 10, 10, --, --, --)
Repeat the last 2 rows until you have 26 rows. each row will decrease 1 st. You will end with 5 (5, 7, 7, 9, --, --, --) sts
Armhole Length
All Sizes
Row 27 (27, 27, 27, 27, 29, 31, 31): Ch 1, turn, sc in the 1st st, *sc in the next ch-1 space, ch 1; repeat from * until 3 sts remain, sc in the last ch-1 space, sc in the last sc. 5 (5, 7, 7, 9, 9, 9, 11)
Row 28 (28, 28, 28, 28, 30, 32, 32): Ch 1, turn, sc in the 1st st, *sc in the next ch-1 space, ch 1; repeat from * until 3 sts remain, sc in the last ch-1 space, sc in the last sc. 5 (5, 7, 7, 9, 9, 9, 9)
Repeat the last 2 rows until you have 30 (32, 34, 38, 40, 42, 44, 69) rows.
Repeat row 27 (27, 27, 27, 27, 29. 31, 31) one more time.
Fasten off.
Second Side
Skip 3 (1, 1, 3, 3, 1, 1, 1) st(s) from the first side, join.
Row 1: Ch 1, sc in the same st, *ch 1, sc in the next ch-1 space; repeat from * until 5 sts remain, leave the last 5 sts unworked. 35 (41, 47, 51, 57, 63, 67, 69)
Place a stitch marker to mark row 1.
Row 2: Ch 1, turn, sc in the 1st st, skip the 1st 2 sts, *ch 1, sc in the next ch-1 space; repeat from * until 3 sts remain, ch 1, skip 2, sc in the last. 33 (39, 45, 49, 55, 61, 65, 67)
Repeat row 2 until you have 6 (12, 16, 22, 24, 28, 30, 30) rows. Start counting from the marked row. Each row will decrease 2 sts. You will end with 25 (19, 17, 11, 9, 9, 11) sts
Neck Shaping/Armhole Length
Sizes S, M, L, 1X, and 2X only
Row 7 (13, 17, 23, 25, --, --, --): Ch 1, turn, sc in the 1st st, ch 1, skip 2, *sc in the next ch-1 space, ch 1; repeat from * until 3 sts remain, sc in the next ch-1 space, sc in the last sc. 24 (18, 16, 10, 10, --)
Row 8 (13, 18, 23, 26, --, --, --): Ch 1, turn, sc in the 1st st, *ch 1, sc in the next ch-1 space; repeat from * until 3 sts remain, ch 1, sc in the last. 23 (18, 15, 10, 10, --)
Repeat the last 2 rows until you have 26 rows. each row will decrease 1 st. You will end with 5 (5, 7, 7, 9, --, --, --) sts
All Sizes
Row 27 (27, 27, 27, 27, 29, 31, 31): Ch 1, turn, sc in the 1st st, *sc in the next ch-1 space, ch 1; repeat from * until 3 sts remain, sc in the last ch-1 space, sc in the last sc. 5 (5, 7, 7, 9, 9)
Row 28 (28, 28, 28, 28, 30, 32, 32): Ch 1, turn, sc in the 1st st, *ch 1, sc in the next ch-1 space; repeat from * until 2 sts remain, ch 1, sc in the last sc. 5 (5, 7, 7, 9, 9, 9, 11)
Repeat the last 2 rows until you have 30 (32, 34, 38, 40, 42, 44, 46) rows.
Repeat row 27 (27, 27, 27, 27, 29, 31, 31) one more time.
Fasten off.
This completes the Front Panel of your Tilley Tank. Next week we will assemble our tanks and add our final finishing touches.
PART THREE
Finishing
Block the front and back.
Slip stitch shoulder seams.
With right side facing join to the side of row 10 of the bottom (where the stitch marker is)
Ch 1, evenly sc (1 sc per row) up the side of the tank top, adding 3 sc around the corners of the underarm then down the other side to the other stitch marker.
Note: If your sc sts seem too loose, go down a hook size.
Seam the side working a flat row slip stitch seam.
Tutorial Here
Video below
Repeat on the other side.
Bottom Trim
Join to any st of the bottom, ch 1, evenly sc around the entire bottom, join, fasten off.
Neck Trim
Work as you did the bottom trim.
Weave in all ends.
Cascadia ebook
free with purchase of 4 or more skeins of our limited edition yarn


