


Add this pattern to your Ravelry Favorites | Join the Furl CAL group
ABOUT OUR DESIGNER
I’m Holly and I started my little business, Storyland Amis in 2015! I’ve always loved designing things even before I knew how to crochet. I used to draw all the time or design knitted dishcloth patterns. Then my sister taught me how to crochet in 2012 and fell in love with it right away! I’ve been designing my own amigurumis almost since the beginning!
My passion is crocheting amigurumi, or ami for short, which is the Japanese art of crocheted or knitted stuffed animals. There are so many possibilities when you have a hook and some yarn! I never get tired of coming up with new designs and often lie awake at night dreaming up some new plushie.
Blog / Facebook / Instagram / Pinterest

SUPPLIES
- Worsted weight yarn (4 ply) in green, brown, & small amount of yellow (U.K. equivalent is Aran & AUS/NZ is 8 ply.) For my green yarn I used Caron Simply Soft Party in the color “Spring Sparkle”
- G (4.00 mm) crochet hook- Holly used her White and Rose Gold Odyssey.
- 12mm black safety eyes
- Fiberfill (or your stuffing of choice)
- Yarn needle
- Scissors
- Stitch marker
- Premade pom poms (0.25 in./0.64 cm) I purchased mine at Hobby Lobby. I used around 19 on my tree
- Small amount of pink felt and matching sewing thread
PATTERN DETAILS
Finished size
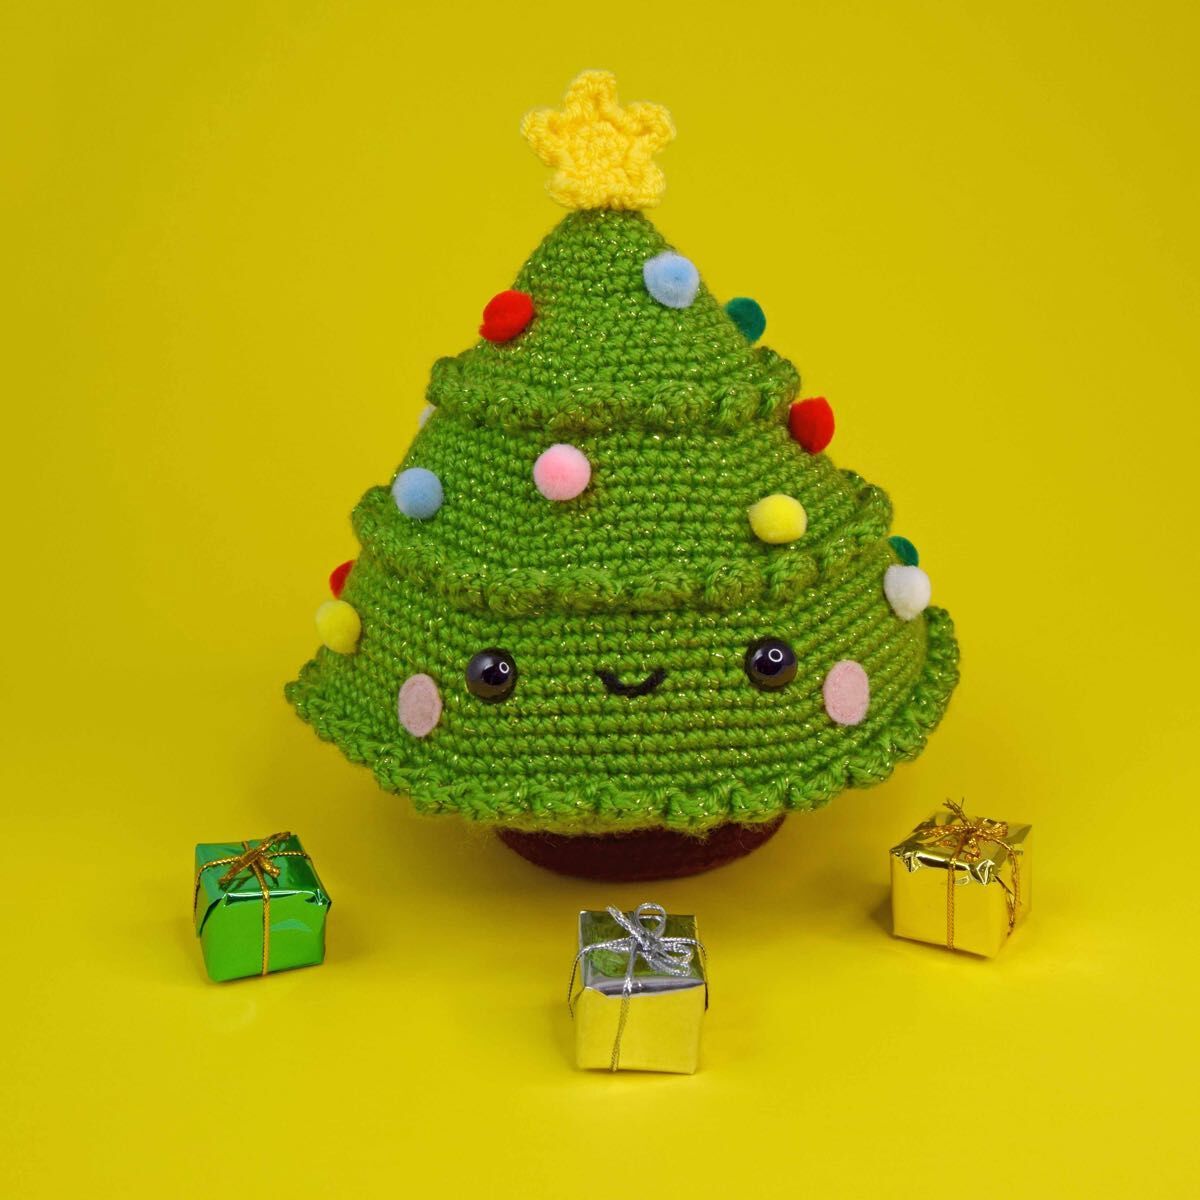
8.5 in. (21.5 cm.) tall
Abbreviation key (US terms)
sc - single crochet, st/sts - stitch(es), Sl st – slip stitch, Dc – double crochet, Trc—triple crochet, dec - decrease (sc the next 2 stitches together), inc - increase (2 single crochet in the next stitch), R1 - round 1, Rep – repeat, BLO - Back Loops Only, ** - repeat this group of instructions amount of times indicated
Note
All rounds are worked continuously (that is, vs. joined rounds.)

PART ONE
For part one, we’ll be crocheting the tree body, tree trim, and attaching facial features.
Tree (Using green yarn)
R1: Ch 2, 6 sc in 2nd ch from hook (you can use the magic circle if you prefer as it won’t make a difference in the end.)
R2: *Inc 1* rep 6 times (12 sts)
R3: Sc in all 12 sts (12 sts)
R4: *Sc 1, inc* rep 6 times (18 sts)
R5: Sc in all 18 sts (18 sts)
R6: *Sc 2, inc* rep 6 times (24 sts)
R7: Sc in all 24 sts (24 sts)
R8: *Sc 3, inc* rep 6 times (30 sts)
R9: Sc in all 30 sts (30 sts)
R10: *Sc 4, inc* rep 6 times (36 sts)
R11: Sc in all 36 sts (36 sts)
R12: *Sc 5, inc* rep 6 times (42 sts)
R13: Sc in all 42 sts (42 sts)
R14: *Sc 6, inc* rep 6 times (48 sts)
R15: Sc in all 48 sts (48 sts)
R16: In BLO *Sc 7, inc* rep 6 times (54 sts) (This is the only round you will crochet in the back loops only until R26)
R17: Sc in all 54 sts (54 sts)
R18: *Sc 8, inc* rep 6 times (60 sts)
R19: Sc in all 60 sts (60 sts)
R20: *Sc 9, inc* rep 6 times (66 sts)
R21: Sc in all 66 sts (66 sts)
R22: *Sc 10, inc* rep 6 times (72 sts)
R23: Sc in all 72 sts (72 sts)
R24: *Sc 11, inc* rep 6 times (78 sts)
R25: Sc in all 78 sts (78 sts)
R26: In BLO *Sc 12, inc* rep 6 times (84 sts) (This is the last round you will crochet in the back loops only.)
R27: Sc in all 84 sts (84 sts)
R28: *Sc 13, inc* rep 6 times (90 sts)
R29: Sc in all 90 sts (90 sts)
R30: *Sc 14, inc* rep 6 times (96 sts)
R31: Sc in all 96 sts (96 sts)
R32: *Sc 15, inc* rep 6 times (102 sts)
R33: Sc in all 102 sts (102 sts)
R34: *Sc 16, inc* rep 6 times (108 sts)
R35: Sc in all 108 sts (108 sts)
Finish off. No need to leave a long tail.
Trim (Using green yarn)
Holding tree upside down, insert your hook into the first front loop stitch from R16 of the tree. Make a sc to secure the yarn. *Make 3 dc in the next sc, sl st 1 in each of the next 2 sc* rep 16 times.


Finish off.
Still holding your tree upside down, insert your hook into the first front loop stitch from R26 of the tree. Make a sc to secure the yarn. *Make 3 dc in the next sc, sl st 1 in each of the next 2 sc* rep 26 times.
Finish off.
Still holding your tree upside down, insert your hook into the first front loop stitch of R35 of the tree. Make a sc to secure the yarn. *Make 3 dc in the next sc, sl st 1 in each of the next 2 sc* rep 36 times.
Finish off. Weave in all ends.
Insert your 12mm safety eyes between R29 & 30 of tree, 13 sts apart (Hint: insert the 1st eye. Count 13 sts from the hole where you inserted the 1st eye and insert the 2nd eye.)

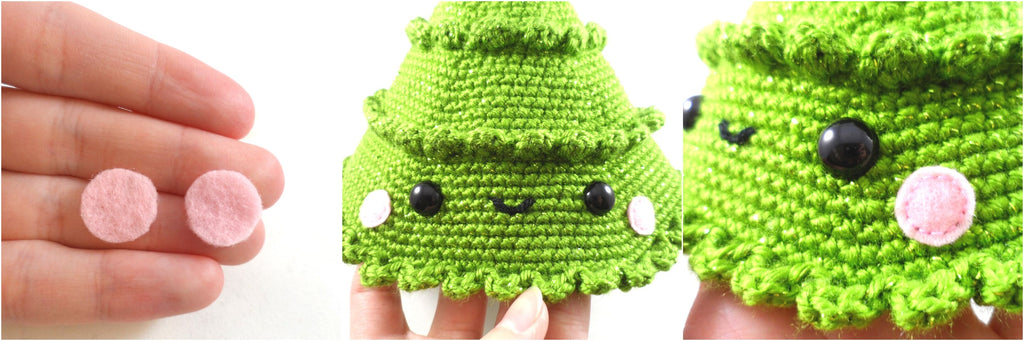
Embroider a small smile about 3 sts wide right between the eyes using black yarn. Cut out two small circles of pink felt for the cheeks and sew them to either side of the head slightly below to the side of the eyes. Alternatively, if you don’t want to sew them on, you can glue them in place.
PART TWO
For part two, we’ll be making the bottom of the tree, the trunk, the star, and adding the ornaments.
Tree Bottom (Using green yarn)
R1: Ch 2, 6 sc in 2nd ch from hook
R2: *Inc * rep 6 times (12 sts)
R3: *Sc 1, inc* rep 6 times (18 sts)
R4: *Sc 2, inc* rep 6 times (24 sts)
R5: *Sc 3, inc* rep 6 times (30 sts)
R6: *Sc 4, inc* rep 6 times (36 sts)
R7: *Sc 5, inc* rep 6 times (42 sts)
R8: *Sc 6, inc* rep 6 times (48 sts)
R9: *Sc 7, inc* rep 6 times (54 sts)
R10: *Sc 8, inc* rep 6 times (60 sts)
R11: *Sc 9, inc* rep 6 times (66 sts)
R12: *Sc 10, inc* rep 6 times (72 sts)
R13: *Sc 11, inc* rep 6 times (78 sts)
R14: *Sc 12, inc* rep 6 times (84 sts)
R15: *Sc 13, inc* rep 6 times (90 sts)
R16: *Sc 14, inc* rep 6 times (96 sts)
R17: *Sc 15, inc* rep 6 times (102 sts)
R18: *Sc 16, inc* rep 6 times (108 sts)
Finish off leaving a very long tail. We will now join the bottom and top of the tree by sewing them together. Going through both loops of the bottom and the back loops of the top, whipstitch them together. They should align perfectly since there are 108 sts around on both top and bottom. In order to make the bottom of the tree nice and flat, we will cut out a 5-inch (approx.) circle of cardboard and place it on top of the stuffing about halfway around. Keep stuffing the tree (underneath the cardboard piece) until it’s all closed up.

Trunk (Using brown yarn)
R1: Ch 2, 6 sc in 2nd ch from hook
R2: *Inc * rep 6 times (12 sts)
R3: *Sc 1, inc* rep 6 times (18 sts)
R4: *Sc 2, inc* rep 6 times (24 sts)
R5: *Sc 3, inc* rep 6 times (30 sts)
R6: *Sc 4, inc* rep 6 times (36 sts)
R7: *Sc 5, inc* rep 6 times (42 sts)
R8: *Sc 6, inc* rep 6 times (48 sts)
R9: *Sc 7, inc* rep 6 times (54 sts)
R10: In BLO *sc 7, dec* rep 6 times (48 sts)
R11-14: Sc in all 48 sts (4 rounds total—48 sts)
Finish off leaving long tail for sewing. Like we did for the tree, add a 3-inch circle of cardboard to the bottom of the trunk. This will give it a flat bottom and help add stability so that your tree can stand up on its own. Stuff and sew to the bottom of the tree.


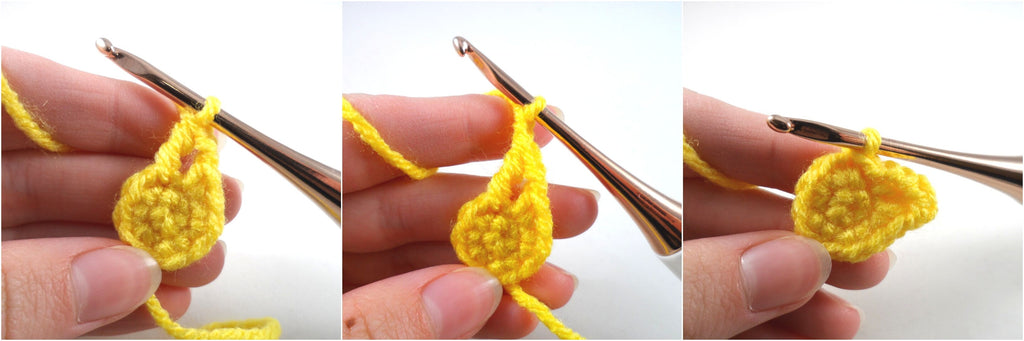
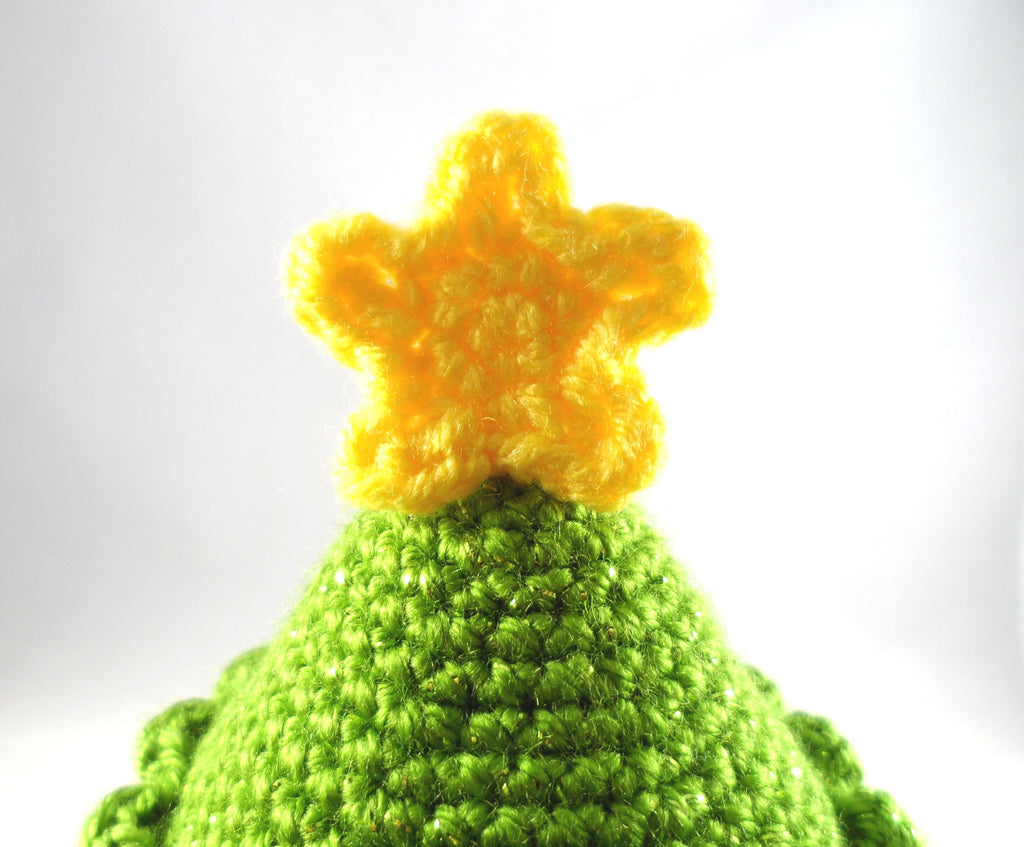
Star (Using yellow yarn)
R1: Ch 2, 5 sc in 2nd ch from hook
R2: *Inc* rep 5 times (10 sts)
R3: *Ch 2, trc in the next sc, ch 2, sl st in the same sc you made the trc, sl st in the next sc* rep 5 times (You should have a five-pointed star by the end.)

Finish off leaving long tail for sewing. Sew star to the top of the tree. Weave in all ends.
Ornaments
I used premade pom poms in assorted colors that I bought from Hobby Lobby for my ornaments. The ones I bought were 0.25 in. (0.64 cm). I glued mine to the tree using clear gel tacky glue. You could also use a hot glue gun or fabric glue. There’s no particular order you have to attach them in, just as many or as few as you like, spaced to your liking.
Feel free to creative with your decorations! You could use ribbons, mini bows, mini bells, or other small things to decorate your tree with.


