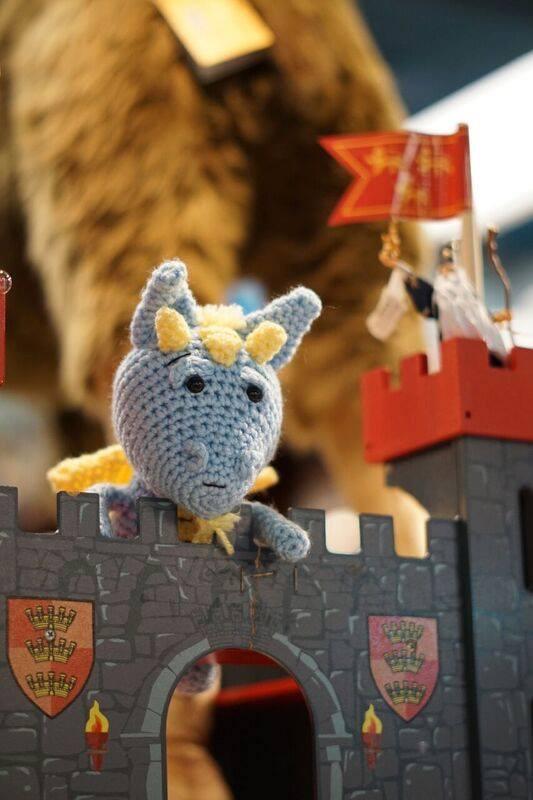
WELCOME BACK TO PART THREE OF THE MAX THE DRAGON CAL!

It's time to pull out your Furls hook and finish up your little dragon! Below is Part Three, and the final part of the Max The Dragon CAL! In this part of the CAL we will be creating the body, legs, tail, arms and the wings! So let's get started!
Abbreviations
ch-chain
sc-single crochet
inc-increase
dec-decrease
Body
Rnd1: Starting at the the bottom of your dragon's body with A - Light Periwinkle Yarn sc x 6 in a magic ring (6). Or you can also ch x 2 and do 6sc in the second chain from your hook (6).
Rnd2: Inc x 6 (12)
Rnd3: Inc x 12 (24)
Rnd4: Sc x 24 (24)
Rnd5: (Sc, inc) x 12 (36)
Rnd6: Sc x 36 (36)
Rnd7: (Sc x 2, inc) x 12 (48)
Rnd8-10: Sc x 48 (48)
Rnd11: Sc x 3, (sc x 7, dec) x 5 (43)
Rnd12: Sc x 43 (43)
Rnd13: Sc x 3, (sc x 3, dec) x 8 (35)
Rnd14-16: Sc x 35 (35)

Rnd17: (Sc x 5, dec) x 5 (30)
Rnd18-21: Sc x 30 (30)
Rnd22: (Sc x 4, dec) x 5 (25)
Rnd23: Sc x 25, fasten off (25)
Leg (Make 2)
Rnd1: Starting at the the bottom of your dragon's leg with A - Light Periwinkle Yarn sc x 6 in a magic ring (6). Or you can also ch x 2 and do 6sc in the second chain from your hook (6).
Rnd2: Inc x 6 (12)
Rnd3: Sc in back loop x 12 (12)
Rnd4-8: Sc x 12, fasten off at the end of Rnd8 (12)
Tail
Rnd1: Starting at the the tip of your dragon's tail with A - Light Periwinkle Yarn sc x 6 in a magic ring (6). Or you can also ch x 2 and do 6sc in the second chain from your hook (6).
Rnd2-4: Sc x 6 (6)
Rnd5: Switch to (B) Yellow yarn and sc x 6 (6)
Rnd6: (Sc, inc) x 3 (9)
Rnd7: Sc, (sc, inc) x 4 (13)
Rnd8: Sc x 13 (!3)
Rnd9: Switch to (A) Light Periwinkle Yarn and sc, (sc, inc) x 6 (19)

Rnd10-11: Sc x 19 (19)
Rnd12: Switch to (B) Yellow yarn and sc x 19 (19)
Rnd13: Sc x 2, (sc x 2, inc) x 5, sc x 2 (24)
Rnd14-16: Sc x 24 (24)
Rnd17: Change to (A) Light Periwinkle Yarn and sc x 24 (24)
Rnd18: (Sc x 3, inc) x 6 (30)
Rnd19: Sc x 30 (30)
Rnd20: (Sc x4, inc) x 6 (36)
Rnd21: Sc x 36 (36)
Rnd22: Change to (B) Yellow yarn and sc x 36 (36)
Rnd 23: (Sc x 5, inc) x 6 (42)
Rnd24-26: Sc x 42 (42)
Rnd27: (Sc x 5 , dec) x 6 (36)
Rnd28:Sc x 26 (26)
Rnd29:Change to (A) Light Periwinkle Yarn and sc x 26 (26)
Rnd30: Sc x 26, fasten off and leave a long tail. (26)
Arm (Make 2)
Rnd1: Starting at the the tip of your dragon's arm with A - Light Periwinkle Yarn sc x 6 in a magic ring (6). Or you can also ch x 2 and do 6sc in the second chain from your hook (6).

Rnd2: (Sc, inc) x 3 (9)
Rnd3-10: Sc x 9 (9)
Rnd11: Dec, sc x 7 (8)
Rnd12-13: Sc x 8 (8)
Rnd14: Dec, sc x 6 (7)
Rnd15-17: Sc x 7, fast off at the end of Rnd17 (7)
Wing (make2)
Row1: Starting at the tip of your wing with (B) Light Yellow yarn ch x 2 (2)
Row2: Turn, sc x 2 (2)
Row3: Turn, ch, sc x 2 (2)

Row4:Turn, ch, inc x 2 (4)
Row5-6: Turn, ch, sc x 4 (4)
Row7: Turn, ch, inc, sc x 2, inc (6)
Row8:Turn, ch, sc x 6 (6)
Row9: Turn, ch, inc, sc x 4, inc (8)
Row10: Turn, ch, sc x 8 (8)
Row11: Turn, ch, dec x 4 (4)
Row12: Turn, ch, sc x 4 (4)
Rnd13: Do not turn, sc aroud the entire piece, then fasten off.
Assembly
Now it is time to piece together you little dragon! Stuff the body, and sew it onto your dragons head. I like to use dress making pins to hold the body in place.

Then stuff the legs and sew them onto the bottom of your dragons body.

Stuff the tail and sew in on to your body.

Add a tiny bit of stuffing in the arms, then sew the arms onto your dragon.

Sew the wings onto the back of your dragon, and sew the belly patch onto your dragons belly. Now weave in all ends and trim them! And now you can enjoy your brand new little dragon!
I hope you enjoyed this month's amigurumi CAL! Make sure to tag your photos of your dragons with #furlscrochet, I would love to see them all! And if you haven't already come on over to the Fun With Furls Facebook Group to share photos of your dragons and to connect with other crocheters, you can find the group here! Again, thank you to everyone for taking part in this CAL!! Should you have any questions about this pattern also please feel free to email me at amidorablecrochet@gmail.com. Happy crocheting :)


