Amigurumi Ice Cream Snail
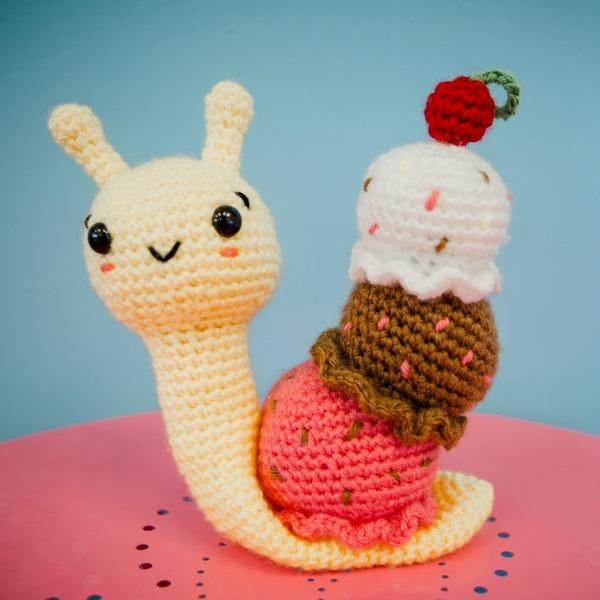
Laci the Banana Split Snail
Updated 7/8/2024
Hi everyone! My name is Vincent and I am the artist behind Knot Bad! I am the 20-something man who lives for Pokémon, heavy metal music, and my fair share of cinnamon rolls. I specialize in fun amigurumi and over the top crochet wear, however, I am making it a current goal to get into some fashion pieces. I reside in the Northwest of the United States in Portland, Oregon. I offer free patterns on my website, knotbadami.com, and you can find me on Instagram (@knot.bad) and Pinterest at Knot Bad Crochet! I may look familiar here to some of you, but to those who are now seeing me for the first time, it’s lovely to meet you!
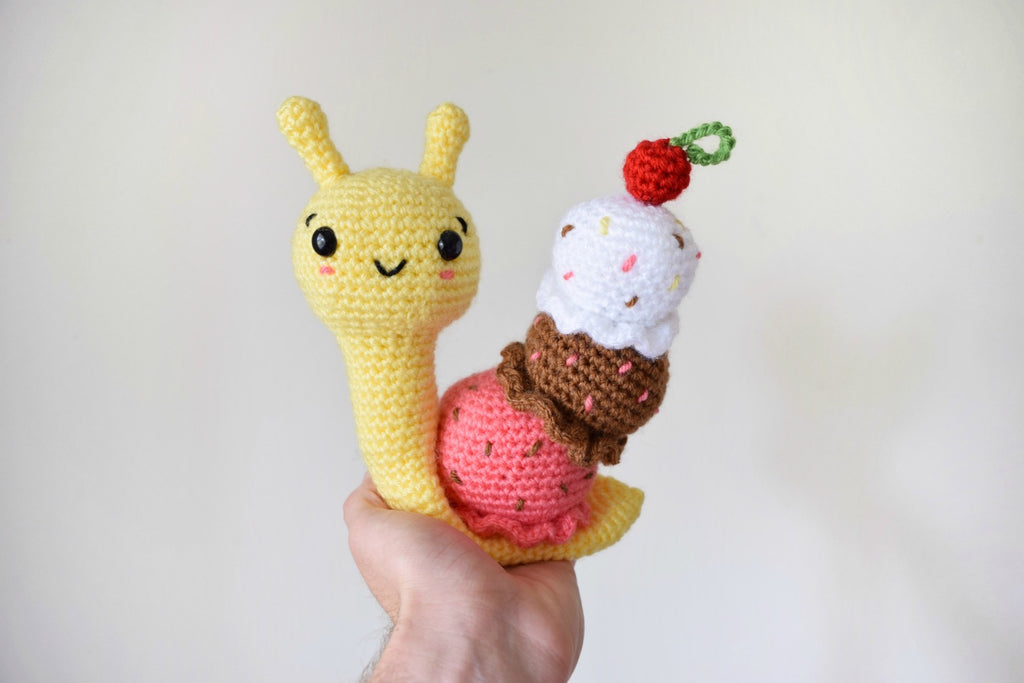
With Summer upon us, who doesn’t love a great Ice cream treat?! I decided to come up with a fun spin on a “traditional” Ice Cream cone.. here is Laci the Banana Split Snail!
Some fun lore behind the name – Laci comes from combining the words “Lac” that comes from “Lactose” and the French suffix “ci” that means “here”. So her name translates to “the dairy right here”!
This week, I’m just introducing you and giving you a rundown of all the materials we will be needing to make this project. Down below you will see the materials lists, all the yarn I used (Mine was all from Lion Brand Yarn!) but if you can find the same or similar colors in any worsted weight yarn, that will do, too! We will be making the main body, then the pieces to attach in separate weeks.
The first part of the pattern will be released on July 14th. I can’t wait for you to join us, see you here next week! Be sure to join our CAL group on Facebook, Fun with Furls, and add this pattern to your Ravelry favorites.
SUPPLIES NEEDED
The yarn I used- All Lion Brand, but any color for worsted weight yarn will do!
Vannas Choice in Lemon
Vannas Choice in Pink Grapefruit
Vannas Choice in White
Vannas Choice in Black (for embroidery)
Vannas Choice in Scarlett
Vannas Choice in Fern
Vannas Choice in Chocolate
12mm safety eyes (2 of them)
Darning needle
Fiber fill
Scissors
Pins
4mm Furls Streamline Metal Hook
And a fun attitude!
PART ONE
Today we will be making the full body of the Snail (head, neck, and body) and as you work it together, you realize that it’s all actually made in one piece! It’ll be important to be aware of when you will be working in the Front Loop Only.
NOTES
This entire piece will be worked in continuous rounds, so it will be helpful to have a stitch marker so you don’t lose your place. It’ll be important to be aware of when you will be working in the Front Loop Only. Be sure to stuff firmly where indicated!
ABBREVIATIONS
Sc- single crochet, Inc- Increase (2 sc in same stitch), Dec- Decrease, FLO- Front Loop Only, *- repeat around the row, ( )- number of stitches at the end of the round
PATTERN
Beginning with the head
Begin in lemon (yellow):
Rnd 1: Sc 6 into Magic Ring (6)
Rnd 2: *Inc* around (12)
Rnd 3: *Sc, Inc* around (18)
Rnd 4: *Sc 2, Inc* around (24)
Rnd 5: *Sc 3, Inc* around (30)
Rnd 6: *Sc 4, Inc* around (36)
Rnd 7: *Sc 5, Inc* around (42)
Rnd 8-14: Sc around (42)
Rnd 15: *Sc 5, Dec* around (36)
Rnd 16: *Sc 4, Dec* around (30)
Insert eyes into row 12, with 8 stitches apart.

Rnd 17: *Sc 3, Dec* around (24)
Begin stuffing firmly
Rnd 18: *Sc 2, Dec* around (18)
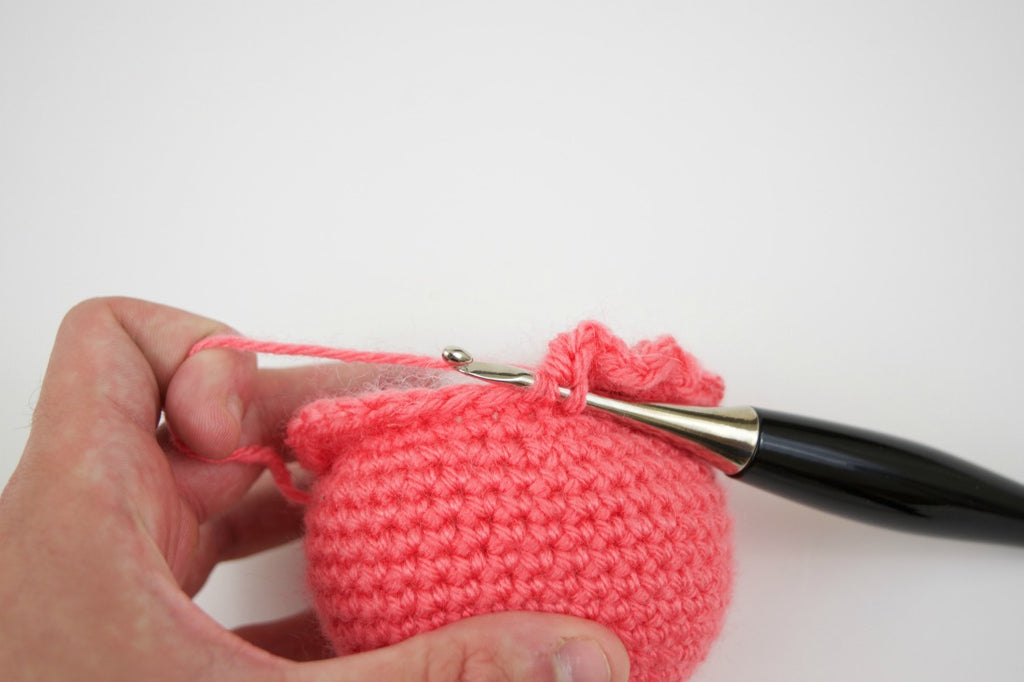
Rnd 19: Sc into FLO around (18)
Rnd 20-31: Sc around (18)
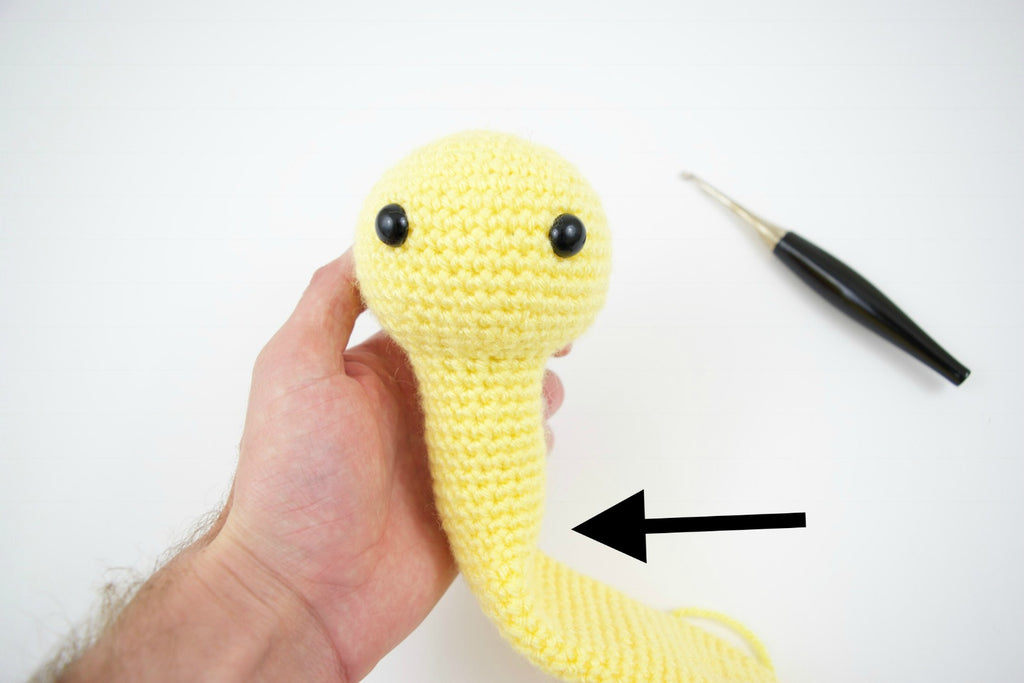
Shown above, you will stuff the neck up until this point, when it becomes a little wider after round 32. Stuff firmly!
Rnd 32: *Sc 2, Inc* around (24)
Rnd 33-52: Sc around (24)
Rnd 53: *Sc 2, dec* around (18)
Rnd 54: Sc around (18)
Rnd 55: *Sc, dec* around (12)
Rnd 56: Sc around (12)
Finish off and leave tail to close hole
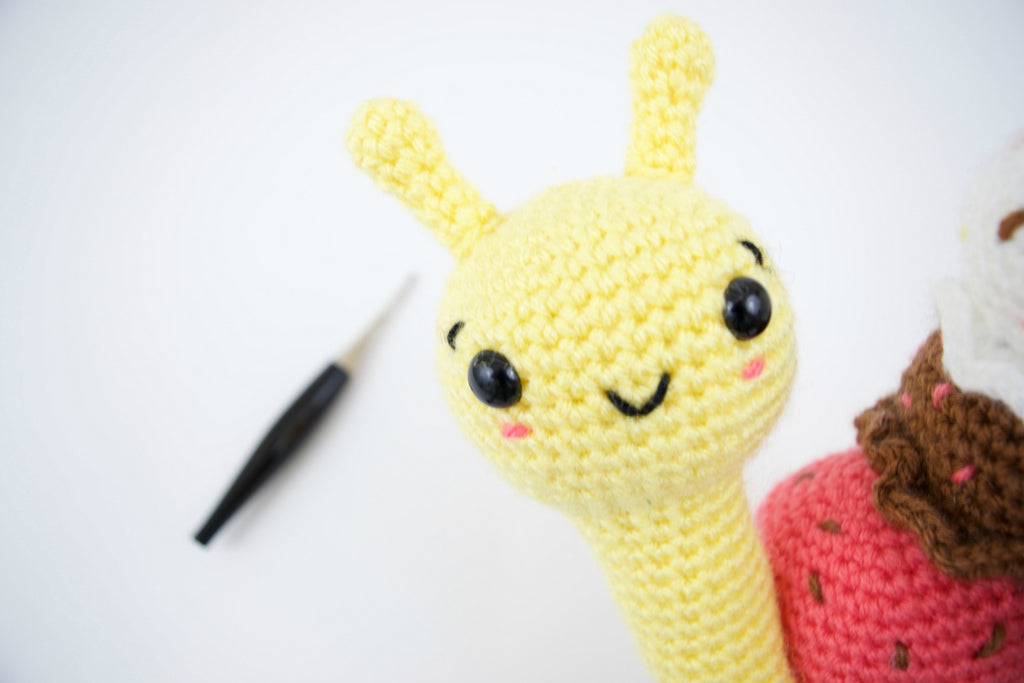
Here is how your body should look at this point when completed!

Meet us back here next week to make the ice cream scoops!
PART TWO
Welcome to part 3 of the Banana Split Snail Amigurumi CAL! Last week we made the full body, which can be found here, and this week we will be making all the Ice Cream Scoops, ears, and cherry!

Antenna
Begin in Yellow (Make 2)
Rnd 1: Sc 6 into Magic Ring (6)
Rnd 2: *Sc, Inc* around (9)
Rnd 3: Sc around (9)
Rnd 4: *Sc, Dec* around (6)
Rnd 5-7: Sc around (6)
Finish off and leave tail for sewing.
Large Strawberry Scoop
Begin in Pink
Rnd 1: Sc 6 into Magic Ring (6)
Rnd 2: *Inc* around (12)
Rnd 3: *Sc, Inc* around (18)
Rnd 4: *Sc 2, Inc* around (24)
Rnd 5: *Sc 3, Inc* around (30)
Rnd 6: *Sc 4, Inc* around (36)
Rnd 7: *Sc 5, Inc* around (42)
Rnd 8-14: Sc around (42)
Rnd 15: *Sc 5, Dec* around (36)
Rnd 16: *Sc 4, Dec* around (30)
Rnd 17: *Sc 3, Dec* around (24)
Rnd 18: In the FLO, 2 Hdc in first stitch, and 4 hdc into next, repeating *2 Hdc, 4 Hdc* around. (This creates the ruffles, seen below)
Finish off and leave a generous tail for sewing
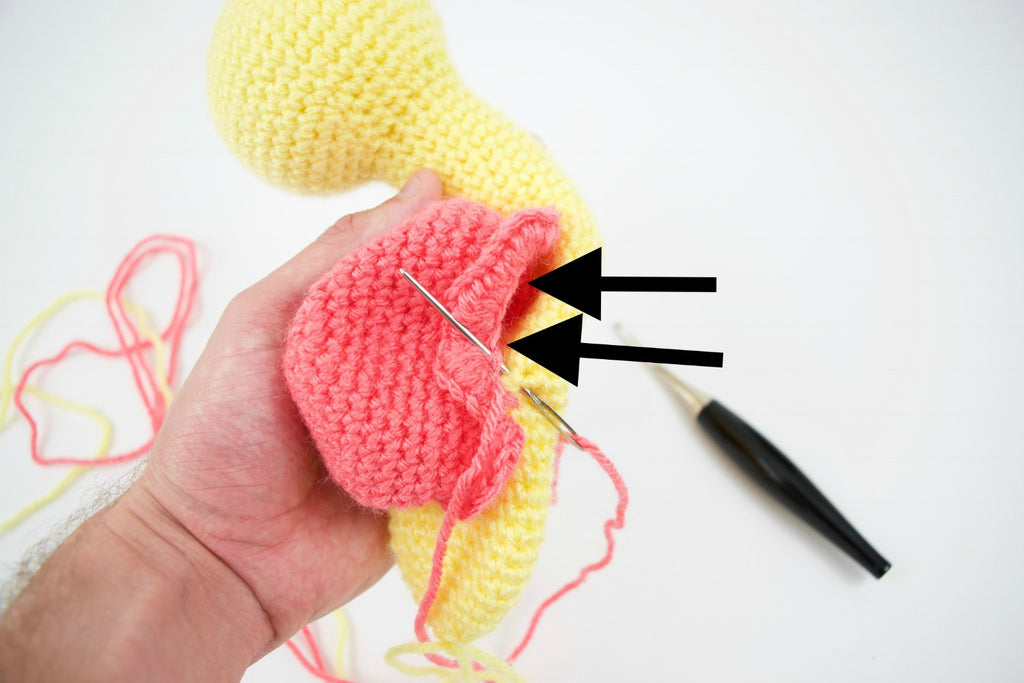
Make sure you are working in the FLO

Remember, when doing this you will be doing your Hdc’s into the FLO. You will be using you the back loops when sewing onto the body!

Chocolate Scoop:
Begin in Brown
Rnd 1: Sc 6 into Magic Ring (6)
Rnd 2: *Inc* around (12)
Rnd 3: *Sc, Inc* around (18)
Rnd 4: *Sc 2, Inc* around (24)
Rnd 5: *Sc 3, Inc* around (30)
Rnd 6: *Sc 4, Inc* around (36)
Rnd 7-12: Sc around (36)
Rnd 13: *Sc 4, Dec* around (30)
Rnd 14: *Sc 3, Dec* around (24)
Just like before, we will be repeating the same process to create the ruffles from the last scoop!
Rnd 15: In the FLO, 2 Hdc in first stitch, and 4 hdc into next, repeating *2 Hdc, 4 Hdc* around. (This creates the ruffles)
Vanilla Scoop
Begin in White
Rnd 1: Sc 6 into Magic Ring (6)
Rnd 2: *Inc* around (12)
Rnd 3: *Sc, Inc* around (18)
Rnd 4: *Sc 2, Inc* around (24)
Rnd 5: *Sc 3, Inc* around (30)
Rnd 6-10: Sc around (30)
Rnd 12: *Sc 3, Dec* around (24)
Rnd 13: *Sc 2, Dec* around (18)
Just like before, we will be repeating the same process to create the ruffles from the last scoop!
Rnd 15: In the FLO, 2 Hdc in first stitch, and 4 hdc into next, repeating *2 Hdc, 4 Hdc* around. (This creates the ruffles)

Cherry
Begin in Red
Rnd 1: Sc 6 into Magic Ring (6)
Rnd 2: *Inc* around (12)
Rnd 3-4: Sc around (12)
Rnd 5: Dec around (6)
Stuff Firmly
When doing the stem, pull your yarn through. Ch10


PART THREE
Welcome back to the last week of this CAL! After this week, you’ll have your Banana Split done! This will include a lot of sewing, so sit down and get comfy! Sewing isn’t my favorite thing to do, but well worth the process every time!
First, we’re going to start by sewing on the body. Place your biggest scoop onto the body and bend the neck so you will know how it’ll sit up. When sewing around, use those black loops to sew it on!

Once you have the bottom Scoop placed, be sure to pull your yarn and needle through a few times the side to attach the scoop to the neck! I find it helpful to pin it into place prior to sewing.

Once you have all the pieces sewn on (Ice cream scoops, antenna, cherry) time to add the last details to the face and ice cream! Embroider on the rest and you will be completed.

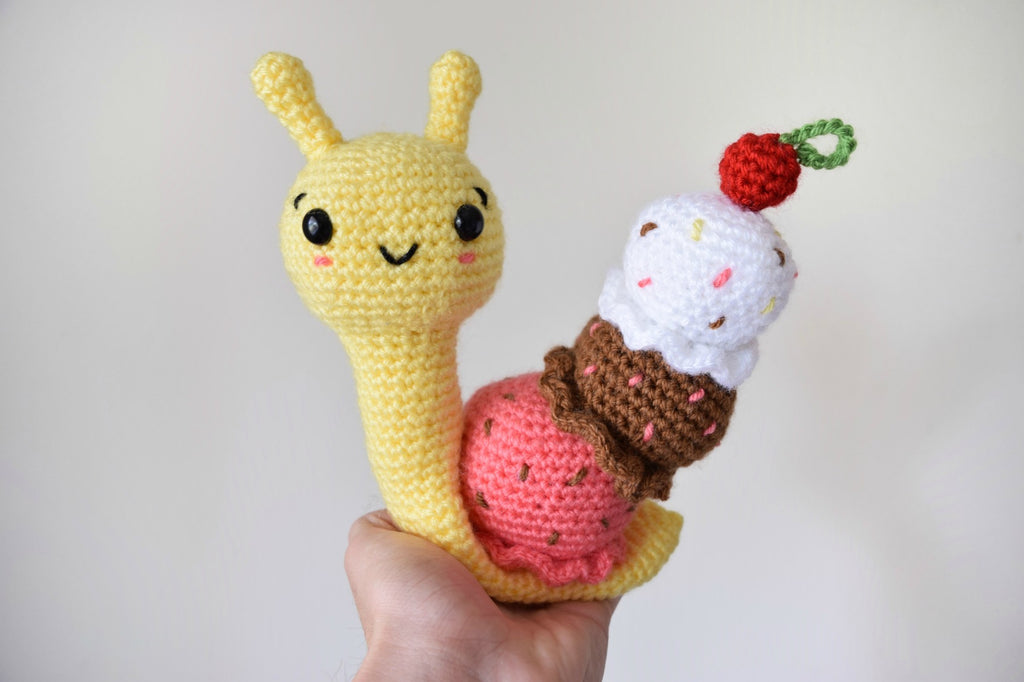
And there you go, we are now all done! I hope you had fun with this project as much as I did. I would love to see how yours turns out, be sure to tag me on Instagram (@knot.bad) to share! This won’t be the last time I’m here on Furls Blog, so make to sure to keep your eyes peeled for my next designs, I look forward to doing this again with all of you!