


Get ready for some festive fun with our Christmas Mouse Amigurumi - a free crochet pattern! In this pattern, we're crocheting an adorable Christmas Mouse dressed in a charming elf outfit. Perfect for beginners, this easy amigurumi pattern uses simple stitches and includes helpful video tutorials to guide you through every toy-making technique. Whether you're new to amigurumi or adding to your holiday collection, this cheerful little mouse is the perfect seasonal project.
Updated 11/25/2025

WHAT DO WE NEED
-
Yarn: Worsted Weight in Gray (165 yards/150 m), Red (165 yards/150 m), White (22 yards/20 m)
- I used DROPS Nepal, but of course you can use any yarn you like, just keep in mind if you decide to go with something other than worsted weight, you will also need to adjust the size of your crochet hook and safety eyes.
- Crochet Hook: Furls Streamline Metal Crochet Hook: Size E / 3.50 mm
- Polyester fiberfill for stuffing
- Safety Eyes: 1/2" (12 mm)
- Cotton Embroidery Floss: Dark brown and white
- Stitch marker (optional)
- Embroidery Needle
Note: For Amigurumi Patterns (or any crochet pattern with tight tension), we recommend Streamline Metal crochet hooks exclusively.
ABOUT THE PATTERN
SIZE: 14" (35,5 cm)
DIFFICULTY: Beginner
ABBREVIATIONS
ch = chain stitch
sl st = slip stitch
sc = single crochet stitch (double crochet stitch in UK and Australia)
sc n = crochet one sc in each of the next n stitches
inc = crochet two single crochet stitches in the same stitch
dec = crochet two single crochet stitches together using the invisible decrease method
sc2tog = crochet two single crochet stitches together using the regular method
(sc 3, inc) x n = repeat the pattern between parentheses n times
[n] = number of stitches in a round after completing the round
NOTES
Work in a continuous spiral, do not join rounds or turn your work, unless instructed otherwise in the pattern.
Use a stitch marker (or a piece of yarn) to mark the end or the beginning of a round.
All stitches are worked into both loops, unless instructed otherwise in the pattern.

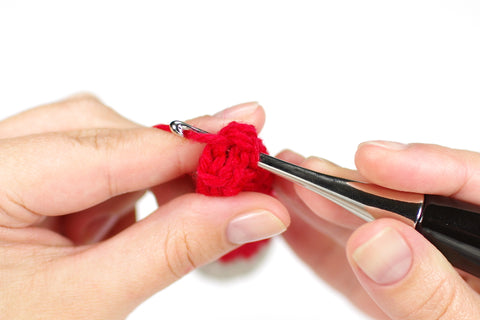
LET'S GET STARTED
So, without further ado, let's get crocheting. First we'll be making the head, muzzle, ear, body, arms, legs and tail.
HEAD
With gray yarn:
Round 1: start with a magic ring, sc 6 [6]
Round 2: inc x 6 [12]
Round 3: (sc, inc) x 6 [18]
Round 4: (inc, sc 2) x 6 [24]
Round 5: (sc 3, inc) x 6 [30]
Round 6: sc, inc, (sc 4, inc) x 5, sc 3 [36]
Round 7: (sc 5, inc) x 6 [42]
Round 8: sc 2, inc, (sc 6, inc) x 5, sc 4 [48]
Rounds 9-13: sc in each st [48]
On round 14 place a stitch marker in the 25th stitch. This marks the center of the face, use it as a guide when placing the eyes.

Rounds 14-15: sc in each stitch [48]
Round 16: sc 16, inc, sc, inc, sc 11, inc, sc, inc, sc 15 [52]
Rounds 17-19: sc in each stitch [52]
Attach safety eyes to either side of the stitch marker, between rounds 14 and 15, leaving 10 stitches (count 9 holes) between them.


Round 20: sc 16, dec, sc, dec, sc 5, dec, sc 5, dec, sc, dec, sc 14 [47]
Round 21: sc 2, dec, sc 6, dec, sc 9, dec, sc 3, dec, sc 13, dec, sc 4 [42]
Start stuffing the head. Keep adding a bit of fiberfill after every few rounds, stuffing the head firmly.
Round 22: (sc 5, dec) x 6 [36]
Round 23: sc, dec, (sc 4, dec) x 5, sc 3 [30]
Round 24: (sc 3, dec) x 6 [24]
Round 25: (sc, dec) x 8 [16]
Sl st in next stitch. Cut the yarn, leaving a long yarn tail for sewing, and fasten off. Stuff the head firmly.


MUZZLE
With gray yarn:
Round 1: start with a magic ring, sc 6 [6]
Round 2: (inc x 2, sc) x 2 [10]
Round 3: sc in each stitch [10]
Round 4: (inc, sc) x 5 [15]
Round 5: sc in each stitch [15]
Round 6: (sc 2, inc) x 5 [20]
Round 7: sc in each stitch [20]
Round 8: sc, inc, (sc 3, inc) x 4, sc 2 [25]
Sl st in next stitch. Cut the yarn, leaving a long yarn tail for sewing, and fasten off.

EAR
With gray yarn:
Round 1: start with a magic ring, sc 6 [6]
Round 2: inc x 6 [12]
Round 3: (sc 2, inc) x 4 [16]
Rounds 4-6: sc in each stitch [16]
Round 7: dec x 8 [8]
Sl st in next stitch. Cut the yarn, leaving a long yarn tail for sewing, and fasten off.

BODY
With gray yarn:
Round 1: start with a magic ring, sc 6 [6]
Round 2: inc x 6 [12]
Round 3: (sc, inc) x 6 [18]
Round 4: (inc, sc 2) x 6 [24]
Round 5: (sc 3, inc) x 6 [30]
Round 6: sc, inc, (sc 4, inc) x 5, sc 3 [36]
Rounds 7-10: sc in each stitch [36]
Round 11: sc 7, switch to red yarn, sc 29 [36]
Round 12: sc, dec, (sc 4, dec) x 5, sc 3 [30]
Round 13: sc in each stitch [30]
Round 14: sc 3, dec, (sc 8, dec) x 2, sc 5 [27]
Round 15: sc in each stitch [27]
Round 16: (sc 7, dec) x 3 [24]
Start stuffing the body. Keep adding a bit of fiberfill after every few rounds, stuffing the body firmly.
Round 17: sc in each stitch [24]
Round 18: sc 2, dec, (sc 6, dec) x 2, sc 4 [21]
Round 19: sc in each stitch [21]
Round 20: (sc 2, dec) x 4, sc, switch to gray yarn, sc, dec, sc [16]
Round 21-22: sc in each stitch [16]
Sl st in next stitch. Fasten off and hide the yarn tail. Finish stuffing the body.

ARMS (make 2)
With gray yarn:
Round 1: start with a magic ring, sc 6 [6]
Round 2: (inc, sc) x 3 [9]
Round 3: (sc 2, inc) x 3 [12]
Round 4: sc in each stitch [12]
Round 5: sc 10, dec [11]
Round 6: sc in each stitch [11]
With red yarn:
Round 7: sc in each stitch [11]
Sc in next seven stitches. Count the last sc as the end of the round from now on.
Stuff the hands firmly. Keep adding a bit of fiberfill after every few rounds, stuffing the arms lightly about half way up.
Round 8: sc 3, dec, sc 6 [10]
Round 9: sc in each stitch [10]
Round 10: sc 3, dec, sc 5 [9]
Round 11: sc in each stitch [9]
Round 12: sc 3, dec, sc 4 [8]
Round 13: sc in each stitch [8]
Round 14: sc 3, dec, sc 3 [7]
Rounds 15-16: sc in each stitch [7]
Round 17: sc 3, dec, sc 2 [6]
Round 18: flatten and sc through both layers
Flatten the top and insert the hook through both layers, skipping the last stitch.
Yarn over and draw up a loop. Yarn over and draw through both loops on the hook.

Crochet all across the opening. Cut the yarn, leaving a long yarn tail for sewing, and fasten off.

If you need a little help with finishing the arms, take a look at a video here.

LEGS (make 2)
With gray yarn:
Round 1: start with a magic ring, sc 6 [6]
Round 2: inc x 6 [12]
Round 3: (sc, inc) x 6 [18]
Rounds 4-7: sc in each stitch [18]
Round 8: (sc 4, dec) x 3 [15]
Round 9: sc, dec, sc 8, dec, sc 2 [13]
Round 10: sc 5, dec, sc 6 [12]
Round 11: sc in each stitch [12]
Stuff the feet firmly. Keep adding a bit of fiberfill after every few rounds, stuffing the legs lightly.
Row 12: sc 5, leave the rest of the stitches unworked for now, turn

Row 13: ch, skip first two stitches, sc 7, turn [8]

Row 14: ch, skip first two stitches, sc 5, turn [6]
Row 15: ch, skip first two stitches, sc 3, turn [4]
Row 16: ch, skip the first stitch, sc2tog [2]

Count the last stitch as the end of the round from now on.
Round 17: pick up 12 stitches, working 4 sc down the row ends, 3 sc across the skipped stitches, 4 sc up the other side of row ends and 1 sc back across the top [12]


If you need a little help with rows 12 - 17, take a look at a video here.
Continue crocheting the legs in spiral.
Round 18: sc 10, dec [11]
Rounds 19-20: sc in each stitch [11]
Round 21: dec, sc 9 [10]
Rounds 22-23: sc in each stitch [10]
Round 24: dec, sc 8 [9]
Rounds 25-35: sc in each stitch [9]
Round 36: (sc 2, dec) x 2, sc [7]
Sl st in next stitch. Cut the yarn, leaving a long yarn tail for sewing, and fasten off. Finish stuffing the legs.

TAIL
With gray yarn:
Round 1: start with a magic ring, sc 7 [7]
Rounds 2-4: sc in each st [7]
Start stuffing the tail. Keep adding a bit of fiberfill after every few rounds, stuffing the tail lightly.
Rounds 5-32: sc in each st [7]
Sl st in next stitch. Cut the yarn, leaving a long yarn tail for sewing, and fasten off. Finish stuffing the tail.

Love This? You May Also Enjoy:

PART TWO
So, without further ado, let's get going with the second and final part of the mouse pattern.
HAT
With red yarn:
Round 1: start with a magic ring, sc 6 [6]
Round 2: sc in each stitch [6]
Round 3: (sc 2, inc) x 2 [8]
Round 4: sc in each stitch [8]
Round 5: sc, inc, sc 3, inc, sc 2 [10]
Round 6: sc in each stitch [10]
Round 7: (sc 4, inc) x 2 [12]
Round 8: sc in each stitch [12]
Round 9: sc 2, inc, sc 5, inc, sc 3 [14]
Round 10: sc in each stitch [14]
Round 11: (sc 6, inc) x 2 [16]
Round 12: sc in each stitch [16]
Round 13: sc 3, inc, sc 7, inc, sc 4 [18]
Round 14: sc in each stitch [18]
Round 15: (sc 8, inc) x 2 [20]
Round 16: sc in each stitch [20]
Round 17: sc 4, inc, sc 9, inc, sc 5 [22]
Round 18: sc in each stitch [22]
Round 19: (sc 10, inc) x 2 [24]
Round 20: sc in each stitch [24]
Round 21: sc 5, inc, sc 11, inc, sc 6 [26]
Round 22: sc in each stitch [26]
Round 23: (sc 12, inc) x 2 [28]
Round 24: sc in each stitch [28]
Round 25: sc 6, inc, sc 13, inc, sc 7 [30]
Rounds 26-32: sc in each stitch [30]
Round 33: sc, inc, (sc 4, inc) x 5, sc 3 [36]
Round 34: sc in each stitch [36]
Round 35: (sc 5, inc) x 6 [42]
Round 36: sc in each stitch [42]
Round 37: sc 2, inc, (sc 6, inc) x 5, sc 4 [48]
Round 38: sc in each stitch [48]
Round 39: (sc 7, inc) x 6 [54]
Rounds 40-42: sc in each stitch [54]
Sl st in next stitch. Cut the yarn, leaving a long yarn tail for sewing, and fasten off.

SCARF
With white yarn:
Row 1: ch 53, starting in 4th ch from hook, dc in each chain, crocheted into the loops on the back of the starting chain

Chain 3, fasten off leaving a short yarn tail. Thread the yarn tail onto a needle.

Insert the needle through the first stitch of the starting chain, going under both loops, and draw the yarn through.

Insert the needle between the two loops of the last stitch and draw the yarn through.

Grab the yarn tail and pull gently until the loop is about the same size as other stitches. Weave in the yarn tails.

Finishing the body and arms
Tip! Crochet a row of slip stitches around the body, embroider the snowflake and sew the muzzle, ear and hat to the head before you sew the head to the body, this way you can fasten all yarn tails securely with a knot inside the head and body.

With red yarn, crochet a row of surface slip stitches between rounds 11 and 12 of the body and rounds 6 and 7 of the arms.
Take the body upside down. Insert the hook under the first stitch, grab the yarn and draw up a loop.

Yarn over and draw through the loop on the hook …

… attaching the yarn to the body.

Insert the hook under the next stitch.

Yarn over and draw the yarn under the stitch and through the loop on the hook.

Repeat the last two steps all around the body. If you need a little help with surface stitching, take a look at a video here.
Fasten off, leaving a long yarn tail, and thread it onto a needle.

Insert the needle under both loops of the first stitch and draw the yarn through.

Insert the needle between the two loops of the last stitch and bring it up through the opening of the body.

Grab the yarn tail and pull gently until the loop is about the same size as other stitches.

Do the same with the arms.

Embroider a snowflake to the front of the body.
Turn the body, so the end of the round is at the center of the back and embroider a little snowflake to the front of the body with white embroidery floss.

Embroidering the nose
Add a bit of stuffing to the muzzle. Insert the needle from the inside of the muzzle and bring it up just above the first round.

Make a few stitches to mark the shape and size of the nose.

Just keep stitching, trying to keep even tension, and fill in the gaps.

Make a long stitch across the top of the nose, hiding any imperfections. Knot the yarn ends together inside the muzzle.

Assembling the mouse
Sew the muzzle to the head.
Pin the muzzle to the head, placing it so the top edge is just below round 12 of the head.

Sew the muzzle to the head with whip stitch.

Use yarn to shape the head a little.
Cut a length of yarn and thread it onto a needle. Insert the needle from the bottom of the head and bring it up right next to the eye. Draw the yarn through, leaving a short yarn tail.

Go about a third of the way around the top of the eye and insert the needle right next to the eye. Bring the needle back out through the opening.

Grab both yarn tails and tug gently, pulling the eye in just a bit.

Knot the yarn ends together. Do the same with the other eye.

Sew the ear to the head.
Place the ear just below round 7 of the head.

Sew the ear to the head, inserting the needle through both layers.

Sew the hat to the head.
Pin the hat to the head, turning it so the end of the round is on your mouse's left hand side.

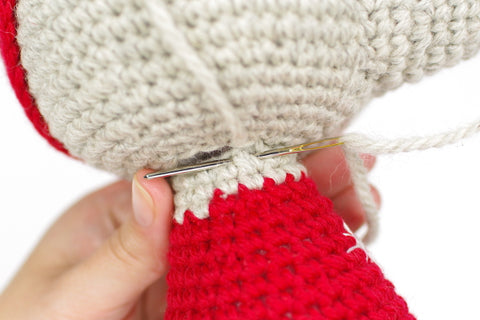
Sew the hat to the head with back stitch just above the last round, making a stitch around every other stitch.

Fold the tip of the hat down, covering the place where the last round ends, and sew it to the head, making a few stitches through the hat.

Sew the head to the body.
Sew the head to the body.
Add a bit more stuffing before closing the seam.

Sew the arms, legs and tail to the body.
Sew the arms to the sides of the body two rows below the head.

Sew the legs to the body, placing them just above round 5, leaving 8-9 stitches (count 7-8 holes) between them.

Sew the tail to the body just above round 5.

Finish sewing and hide all yarn tails.
Tie the scarf around the neck. And you're done!

About the Designer: Designed by Kristi Tullus. If you have any questions, feel free to contact me at kristi@spire.ee, I am always happy to help. And if you haven't already, join us at our exclusive Facebook group, Fun with Furls.


