

Hey everyone, it's Brenna from Little Raven Fiber Arts, comin' in hot this month with some fun moth facts! Did you know there are more than 11,000 moth species in the United States alone, which is more than all the bird and mammal species in North America combined? They come in so many sizes and colors, I thought it would be the perfect little summer stashbusting project to share with y'all in July, which also happens to play host to National Moth Week (July 23-29)!
More me!
Updated 7/25/2024

Throw away those mothballs, you'll want these sweethearts to stay!
Add this pattern to your Ravelry favorites to stay up to date on pattern releases and to share your pictures.

Materials
• Stash yarn! Most of my stash is worsted weight acrylic or wool, so that's what I used for my moths. You can use any weight yarn you have lying around and want to use up, just grab the hook to match.
I recommend a variegated yarn for the wings, it makes them pop!
• Crochet thread for antennae (optional - you can do thread crochet antennae or just use scrap yarn, there will be instructions for both)
• Crochet Hook to match your stash yarn: for my worsted weight yarn I use my Streamline Metal Furls Hook in size G (4.0mm) to keep my stitches tight (so you can't see stuffing peeking through!).
• Stuffing
• Black fabric paint (preferably in a bottle with a squeeze tip)
• Yarn needle
• Scissors
• Sewing pins (optional but recommended for pinning the wings)
Before we start, I've got some more fun moth facts for y'all! Did you know moths can range in size from smaller than a pencil tip to bigger than a songbird? The largest known moth in the world, the Atlas Moth, has a wingspan of almost a foot! Big fluffy friend!
My moths are really quick and easy to make and I've had so much fun picking color combos from my stash, so I hope you all have fun with this one, too!

Notes
• The legs are worked as part of the body of the moth, no sewing them on later!
• I've included two different antennae options, either crocheted in thread or just using some scrap yarn.
• When working in rows (for the wings), I do not chain 1 when I turn and I work directly into the first sc of the turned row. Keep that first stitch relatively loose so you don't have to sweat to get the hook through when you come back to it the next row (this is my personal experience as a tight stitcher, you may not have this problem).

Troubleshooting
• If your little legs don't line up as shown below, you can easily adjust their alignment by working them one or two stitches before or after the pattern indicates. Everybody's stitches spiral differently when working in the round, if this happens to you, it's nothing to worry about!

• If the wings curl instead of easily lying flat (some yarns will do this), you could try using a stiffener (see a few ideas here). I have not tried this myself: if my wings curl, I just make new ones with a different yarn *shrug*. Does that qualify as lazy?
All good? Let's go!
Body
ch 2 or magic loop
1. 6 sc in 2nd ch from hook / magic loop (6)
2. *3 sc in 1st sc, sc in next sc* rep *-* around (12)
3. sc in 1st sc, in BLO sc in next 2 sc, both loops sc in next sc, in BLO sc in next 3 sc, both loops sc in next sc, in BLO sc in next 2 sc, both loops sc in last 2 sc (12)
4. in FLO, *2 sc in 1st sc, sc in next sc* rep *-* 2x, 2 sc in each of the next 3 sc, sc in next sc, rep *-* 2x (19)
5. 2 sc in 1st sc, sc in next 6 sc, *ch 4, slp st in 2nd ch from hook and in each of the last 2 ch* (leg made), sc in next 4 sc, rep *-* (leg made), sc in last 8 sc (20)
6-8. sc in each sc around (20)
9. sc in 1st 6 sc, sc dec, sc in next sc, *ch 4, slp st in 2nd ch from hook and in each of the next 2 ch* (leg made), sc in next 4 sc, rep *-* (leg made), sc in next sc, sc dec, sc in last 4 sc (18)
10. sc in 1st 15 sc, sc dec, sc in last sc (17)
11. *sc dec, sc in next sc* rep *-* 2x, sc in last 11 sc (15)
12. sc in 1st 3 sc, sc dec, sc in next 2 sc, *ch 3, slp st in 2nd ch from hook and in last ch* (leg made), sc in next 3 sc, rep *-* (leg made), sc in next 2 sc, sc dec, sc in last sc (13)
STUFF the body firmly
13. sc dec, sc in next 5 sc, sc dec, sc in last 4 sc (11)
14. sc in 1st 9 sc, sc dec (10)
15. sc in 1st sc, *sc dec, sc in next 2 sc* rep *-* 2x, sc in last sc (7)
STUFF the body a little bit more so it doesn't have a sad tail end
16. sc dec x2
FO, use the yarn end to close up the hole. Weave in or 'lose' the yarn end in the body of the moth.
Little moth grub done!

Let's give them wings!

Make 2
ch 2
1. 2 sc in 2nd ch from hook, TURN (2)
2. 2 sc in 1st sc, sc in last sc, TURN (3)
3. sc in 1st sc, 2 sc in next sc, sc in last sc, TURN (4)
4. 2 sc in 1st sc, sc in last 3 sc, TURN (5)
5. sc dec, sc in next sc, 2 sc in next sc, sc in last sc, TURN (5)
6. 2 sc in 1st sc, sc in last 4 sc, TURN (6)
7. sc in 1st 4 sc, 2 sc in next sc, sc in last sc, TURN (7)
8. sc in 1st 5 sc, sc dec, TURN (6)
9. sc in 1st 3 sc, slp st in next sc, TURN (4)
10. skip slp st, sc in next sc, sc dec, TURN (2)
11. work 5 sc across (this requires a sc in the slp st from row 9 and then a sc in the same sc as the slp st from row 9), slp st in last sc (6)

FO, weave in only this end, do not weave in the beginning tail!
To get distinct left and right wings, just flip one over.
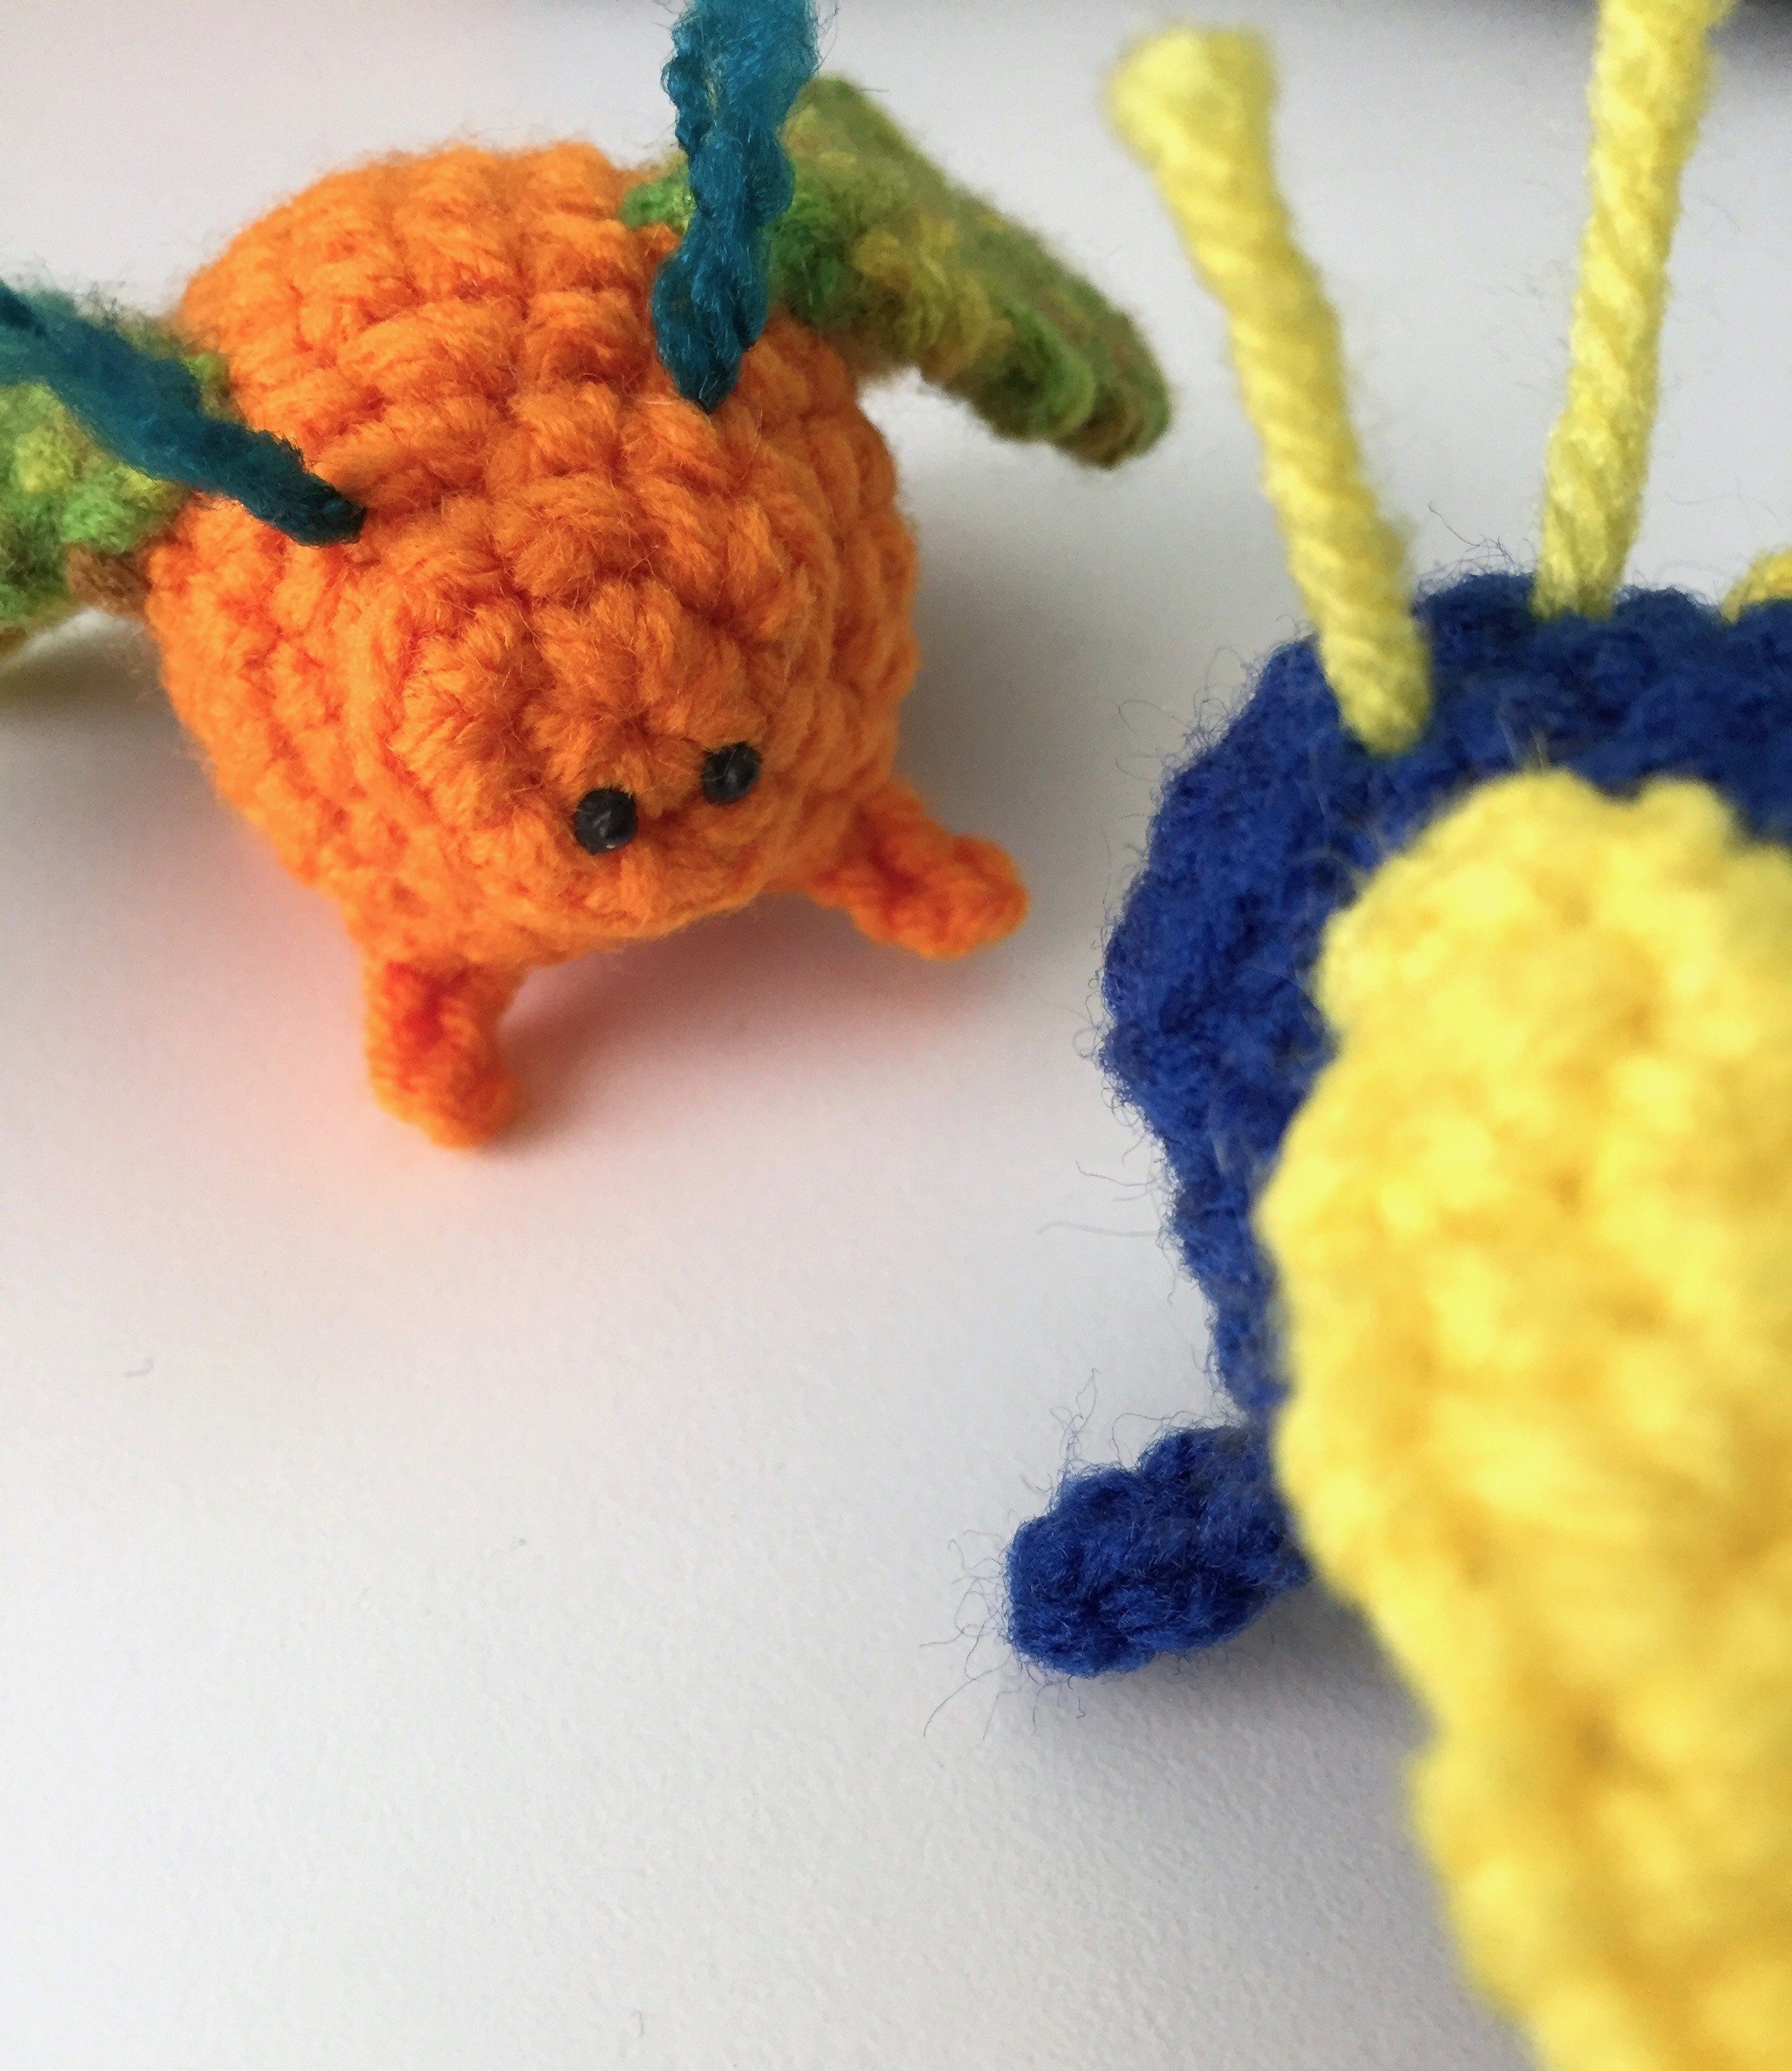
Using the beginning tail, sew only the tops of the upper wings to the moth body at about round 4 (see picture). I always pin them on first to make sure they're aligned in relation to the little legs so I don't end up with the Leaning Moth of Pisa.

Weave in or 'lose' the yarn ends in the body.
Make 2
ch 2
1. 2 sc in 2nd ch from hook, TURN (2)
2. 2 sc in 1st sc, sc in last sc, TURN (3)
3. sc in 1st sc, 2 sc in each of the last 2 sc, TURN (5)
4. sc in 1st sc, 2 sc in next sc, sc in last 3 sc, TURN (6)
5. sc dec, sc in next sc, 2 sc in next sc, sc in last 2 sc, TURN (6)
6. sc in 1st 4 sc, slp st, TURN (5)
7. skip slp st, sc in next 2 sc, 2 sc in next sc, sc in last sc, TURN (5)
8. work 7 sc across (this requires a sc in the slp st from row 6 and then a sc in the same sc as the slp st from row 6), slp st in last sc (8)

FO, weave in only this end, do not weave in the beginning tail!
Again, for specific left and right wings, just flip one over.
Using the beginning tail, sew only the tops of the lower wings to the moth body at about round 9 (see picture). They should be closer together than the upper wings.

Feathered Antennae
(like my Mothman!)

((( Cryptid spotted )))
Make 2
With crochet thread and size 7 steel hook, ch 10
1. slp st in 2nd ch from hook, sc in next 2 ch, hdc in next ch, dc in each of the next 2 ch, tc in next 2 ch, 5 dc in last ch, turning the work upside down so you're working along the bottom of the ch, tc in next 2 ch, dc in next 2 ch, hdc in next ch, sc in next ch, slp st in next ch (same ch as 1st st).
FO and weave in this tail only!
Thread your yarn needle (yes, yarn needle) with the beginning tail of the antennae and attach them to the head as pictured above. I don't tack mine down with too many extra stitches, I essentially just pull the tail through and then 'lose' the end in the body of the moth (hence the yarn needle: a regular needle will catch on your yarn and it'll be nearly impossible to 'lose' the end cleanly). If this moth is intended for use as a toy, however, make sure those antennae aren't going anywhere and sew it firmly in place.
The Easy Antennae
With scrap yarn and yarn needle, insert the needle through the underside of the moth and pull the scrap yarn through but leave a few inches sticking out. Make sure your yarn needle does not catch on any stitches of the body when you do this.
Weave the scrap through the body a few times (the 'lose' the yarn end technique) to secure it. I pass it through about 4 times before I can pull the yarn snug and it doesn't shift the bit sticking out.
Bring the needle through the body to poke it out on one side of the head and trim yarn to desired length, then trim the bit sticking out and tuck it away!
Repeat on the other side.
Using your fabric paint, dab on some eyes and allow them to dry.

If you have any questions, comments or corrections regarding this pattern please feel free to contact me (littleravenfiberarts@gmail.com), I’m here to help.
Make sure to pop in to the Fun With Furls Facebook Group and the Ravelry Project page to share your moth photos and admire everyone else’s crochet handiwork too!
Happy Crocheting!
Brenna


