

*sniff sniff* Hey guys, do you smell that? Smells like.... cozy sweaters, apple cider, warm spices, dropping temperatures... smells like AUTUMN!
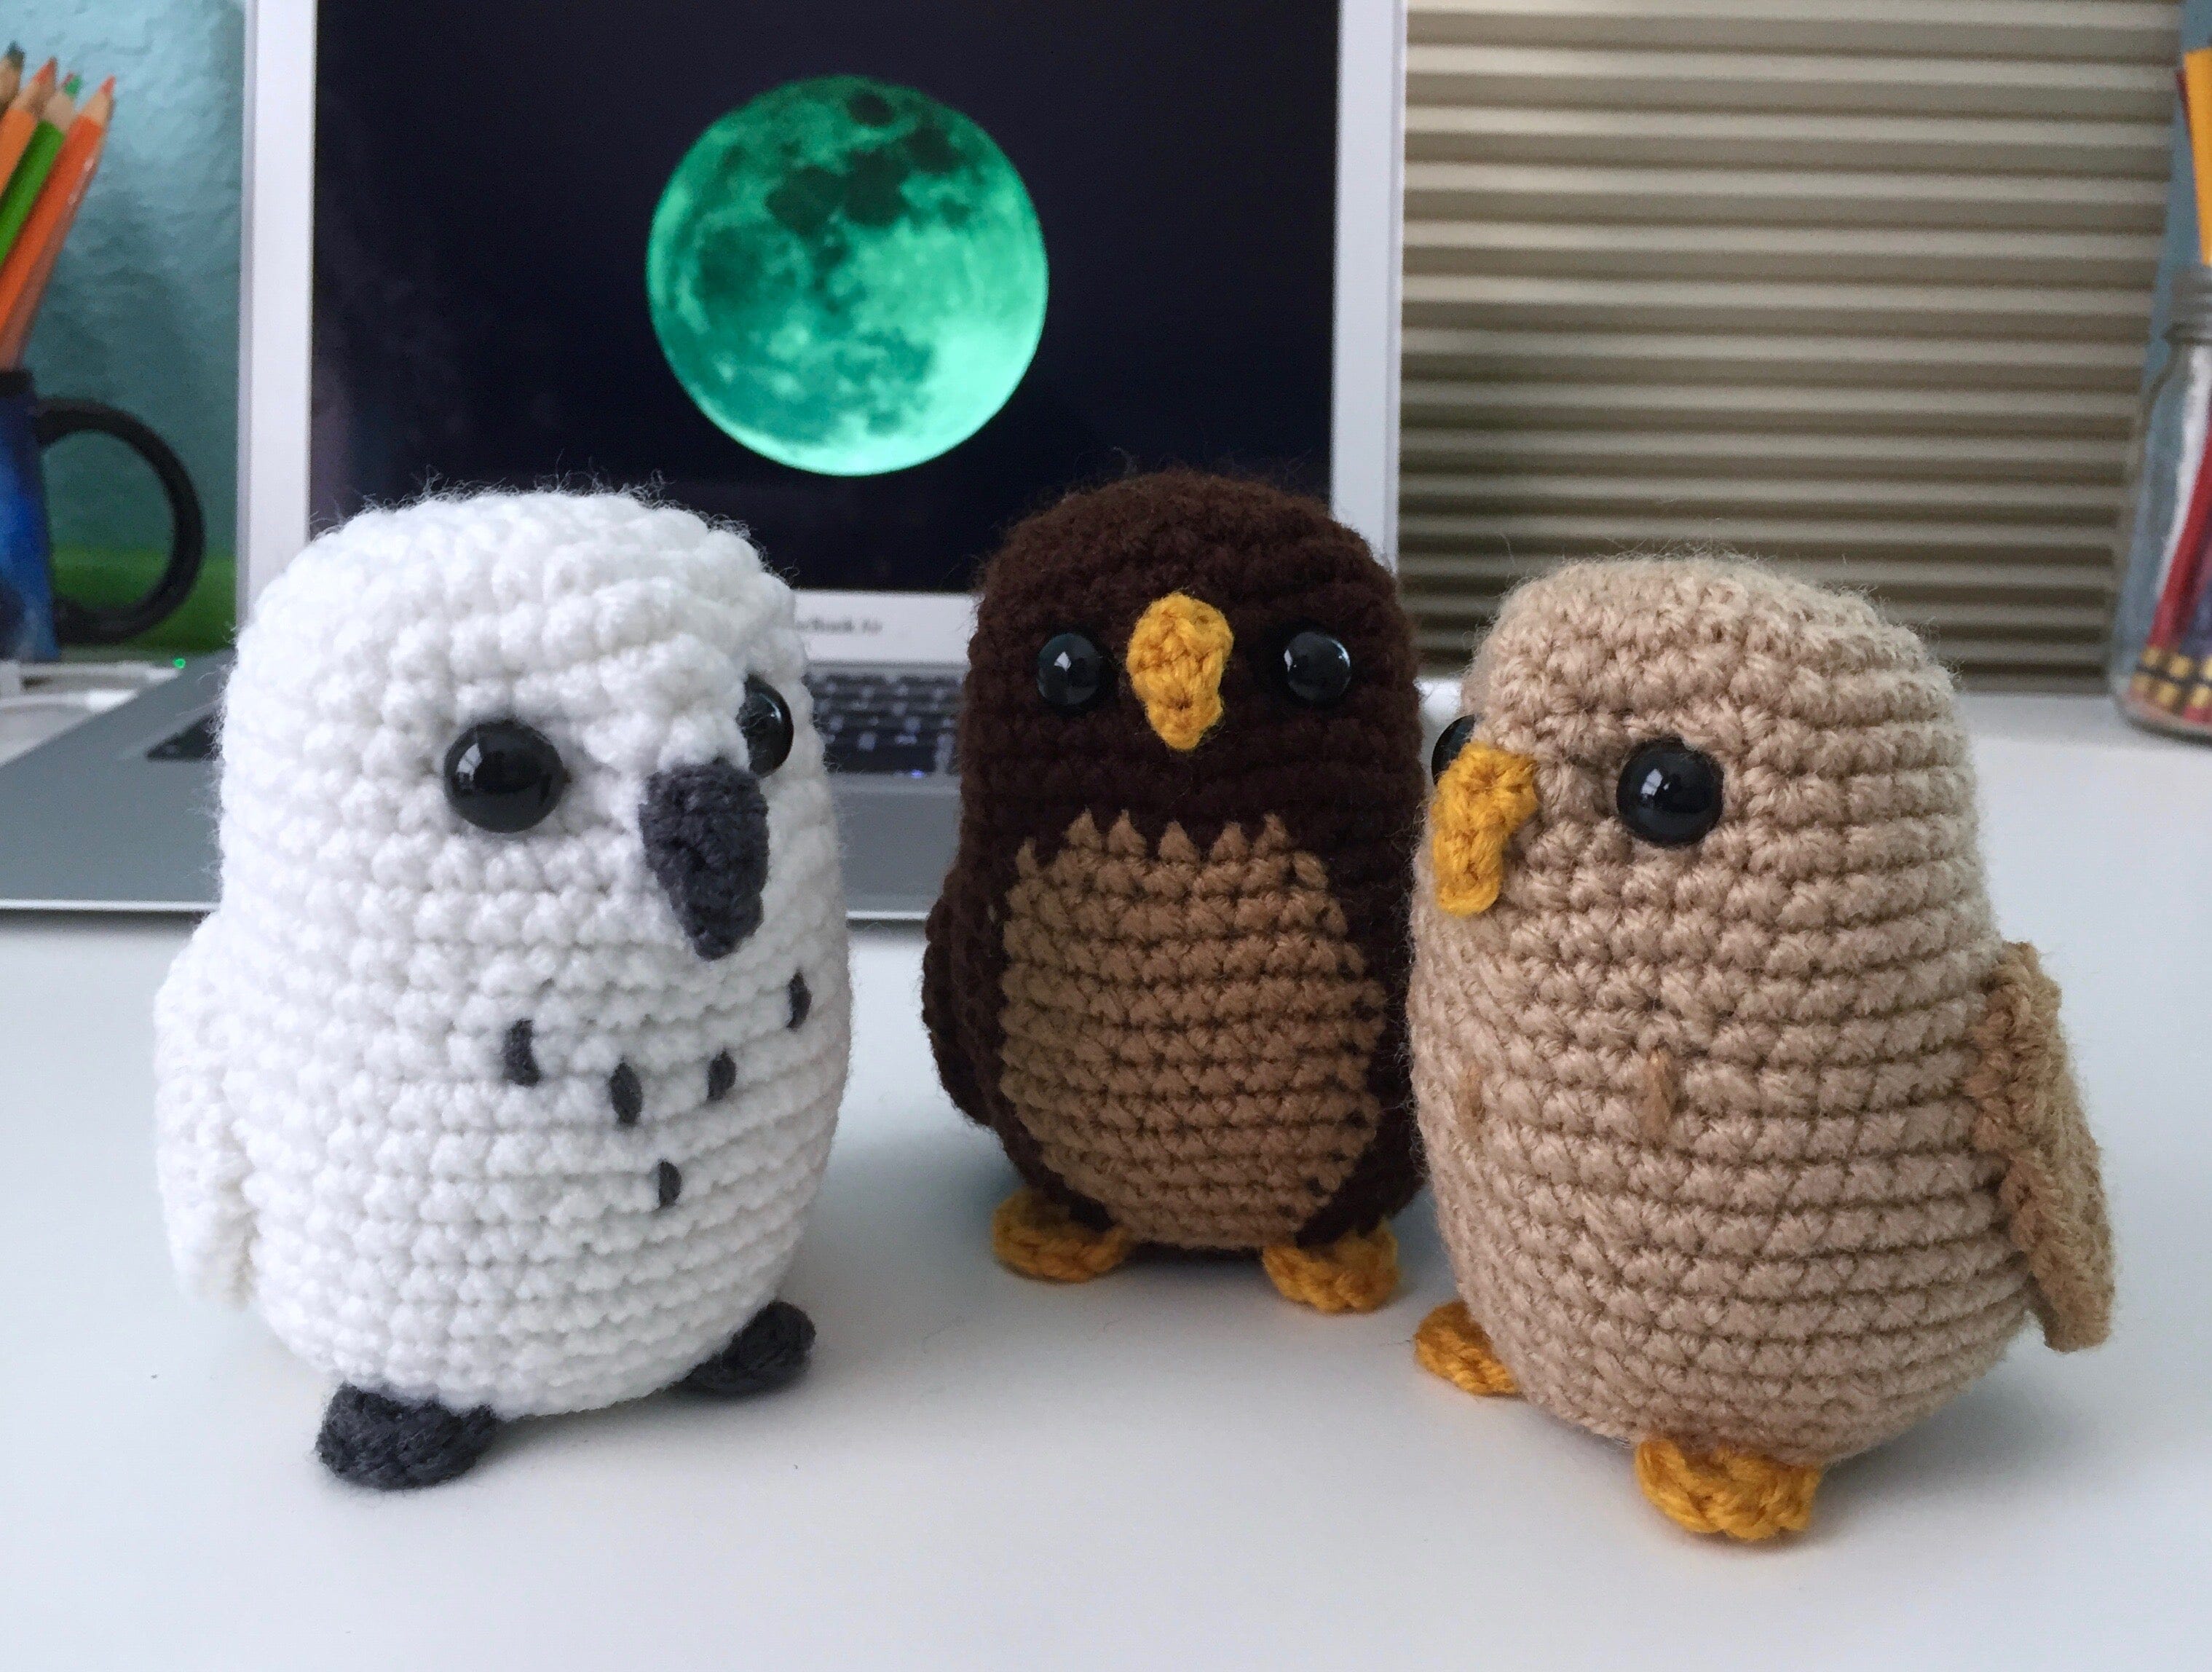
I'll admit, I'm one of the many youngsters that grew up with the Harry Potter series so the beginning of fall has always held a little extra magic for me. And one of the best things about the Potter universe, for me, was the novelty of owl post! Receiving mail is twice as fun when it arrives on wings! And with these little crocheted owls, food, shelter and certain special... pellets will never be a concern.
Updated 10/22/2024

First we will make the body and the beak of the owl, then we'll do the wings, feet and accessories!
Materials
• Furls Streamline Metal crochet hook size G (4.0mm)
• Worsted weight acrylic yarn like Wander
• 10mm black snap-in eyes
• Stuffing
• Yarn needle
• Scissors
• Sewing pins (optional but recommended for pinning the wings)
Abbreviations:
ch = chainsc = single crochet
sc dec = single crochet decrease
slp st = slip stitch
rep = repeat
BLO = back loops only
NIBL = now in both loops
FO = finish off

Owl body
ch 2 or magic loop
1. 8 sc in 2nd ch from hook (8)
2. 2 sc in each sc around (16)
3. *2 sc in 1st sc, sc in next sc* rep *-* around (24)
4. *2 sc in 1st sc, sc in next 2 sc* rep *-* around (32)
5. sc in each sc around (32)
6. sc 11, sc dec, sc in next sc, 3sc, sc in next sc, sc dec, sc in last 14 sc (32)
7. sc in 1st 9 sc, 2 sc, sc dec 2x, 3 sc in next sc, sc dec 2x, 2 sc in next sc, sc in last 12 sc (32)
8. sc in 1st 9 sc, 2 sc in next sc, sc in next sc, sc dec, sc in next 3 sc, sc dec, sc in next sc, 2 sc in next sc, sc in last 12 sc (32)
9. sc in 1st 14 sc, 2 sc in next sc, sc in last 17 sc (33)
10. sc in 1st 27 sc, *2 sc in next sc, sc in next 2 sc* rep *-* 2x (35)
Put the safety eyes in between rounds 7-8 (I put the first eye about 10 stitches from where my stitch marker was in round 7, the second about 18 stitches from the stitch marker. One eye is in the middle of an increase, the other between 2 decreases)
11. 2 sc in 1st sc, sc in next 9 sc, *sc dec, sc in next 2 sc* rep *-* 3x, sc in last 13 sc (32)
12. sc in each sc around (32)
13. sc in 1st 10 sc, *2 sc in next sc, sc in next 3 sc* rep *-* 3x, sc in last 11 sc (35)
14. sc in 1st 32 sc, 2 sc in next sc, sc in last 2 sc (37)
15. 2 sc in 1st sc, sc in last 36 sc (38)
16. sc in 1st 15 sc, *sc dec, sc in next 3 sc * rep *-* 2x, sc in next 9 sc, 2 sc in next sc, sc in last 3 sc (37)
17. sc in 1st 2 sc, 2 sc in next sc, sc in last 34 sc (38)
18-19. sc in each sc around (38)
20. sc in 1st 11 sc, *sc dec, sc in next 3 sc* rep *-* 4x, sc in next 3 sc, 2 sc in next sc, sc in next 2 sc, 2 sc in last sc (36)
21. sc in 1st 2 sc, 2 sc in next sc, sc in next 28 sc, in BLO sc dec, sc in next 2 sc, remove marker, sc dec (35)
22. still in BLO, sc in 1st 2 sc, sc dec, NIBL sc in next 26 sc, sc dec, sc in last 3 sc (33)
23. *sc dec, sc in next 3 sc*, in BLO rep *-* 4x, sc dec, sc in next 2 sc, NIBL sc in next sc, sc dec, sc in last sc (26)
STUFF the owl firmly, make sure there's a decent pack of stuffing at the top of the head (sometimes the eye stalks can get in the way)
24. sc in 1st sc, *sc dec, sc in next 2 sc* rep *-* 5x, sc dec, sc in next sc, sc dec (19)
25. sc in 1st sc, *sc dec, sc in next sc* rep *-* 6x (13)
26. sc dec around
FO and use the long tail end to sew up any remaining hole. You can accentuate the contours of the owl's face with a little bit of needle shaping: still using the FO end, poke it up through the body until it comes out next to one of the eyes (inner corner). *Weave through the stitch right beside the eye and then poke through to the other side: repeat from * . Pull snug to better define the eye sockets!

Beak
With chosen beak color, ch 2
1. 2 sc in 2nd ch from hook, TURN (2)
2. sc in each sc across (2)
FO
Using the FO end, sew the top edge of the beak (row 2) between the owl's eyes. Weave in the ends.

Join us back here next weekend (September 23) for the wings, feet and accessories!
Next we'll put the finishing touches on our owls by giving them wings, feet and little scarves!

Wings
ch 5
1. 2 sc in 2nd ch from hook, sc in next 2 ch, 4 sc in last ch, turning your work so you’re working along the bottom of the ch, sc in next 2 ch, 2 sc in same ch as 1st 2 sc (12)
2. 2 sc in 1st 2 sc, sc in next 3 sc, 2 sc in next 2 sc, sc in next 3 sc, 2 sc in last 2 sc (18)
3. 2 sc in 1st 3 sc, sc in next 5 sc, 2 sc in next sc, ch 1, 2 sc in next sc, sc in next 6 sc, 2 sc in last 2 sc (25)
4. sc in 1st sc, 2 sc in next sc, sc in next sc, slp st in next sc
FO leaving remaining stitches unworked. Weave in the beginning tails of the wings only, use the FO tails to sew the wings onto the body. The tops of the wings should sit at about round 12 of the body. I recommend pinning them on before sewing to allow you to make adjustments before committing.
I've only sewn about a 2-inch portion of the wings to the body so I could, if I wanted to, tuck a note underneath a wing. Owl post in action!

Feet
Make 2
ch 2
1. 5 sc in 2nd ch from hook to form a semicircle
FO and sew the flat edges of the semicircles to the underside of the owl, to the row where there are loops exposed from working in BLO.

Scarf
With scarf color of choice, ch 4
1. sc in 2nd ch from hook and in each ch across, TURN (3)
2. sc in each sc across, TURN (3)
Continue working straight turning rows until the scarf is long enough to wrap once around the owl's neck and touch ends without stretching (for me, this was 46 rows). FO and sew the two ends together so you have a circle.
To hide the seam of the join and create the false tie on the scarf, make another, much shorter length of scarf (for me, this meant about 16 or 18 rows), FO and fold it over the seam on the circle (the chain edge should line up with the bottom of the circle, just barely peeking out).
Secure the false tie by sewing that peeking-out chain edge to the row of stitches it touches (on the short length of scarf), creating a loop that goes around the circle piece and hides the seam! Weave in the ends.

If you have any questions, comments or corrections regarding this pattern please feel free to contact me (littleravenfiberarts@gmail.com), I’m here to help.


