

Updated 10/24/2025

About the Pattern:
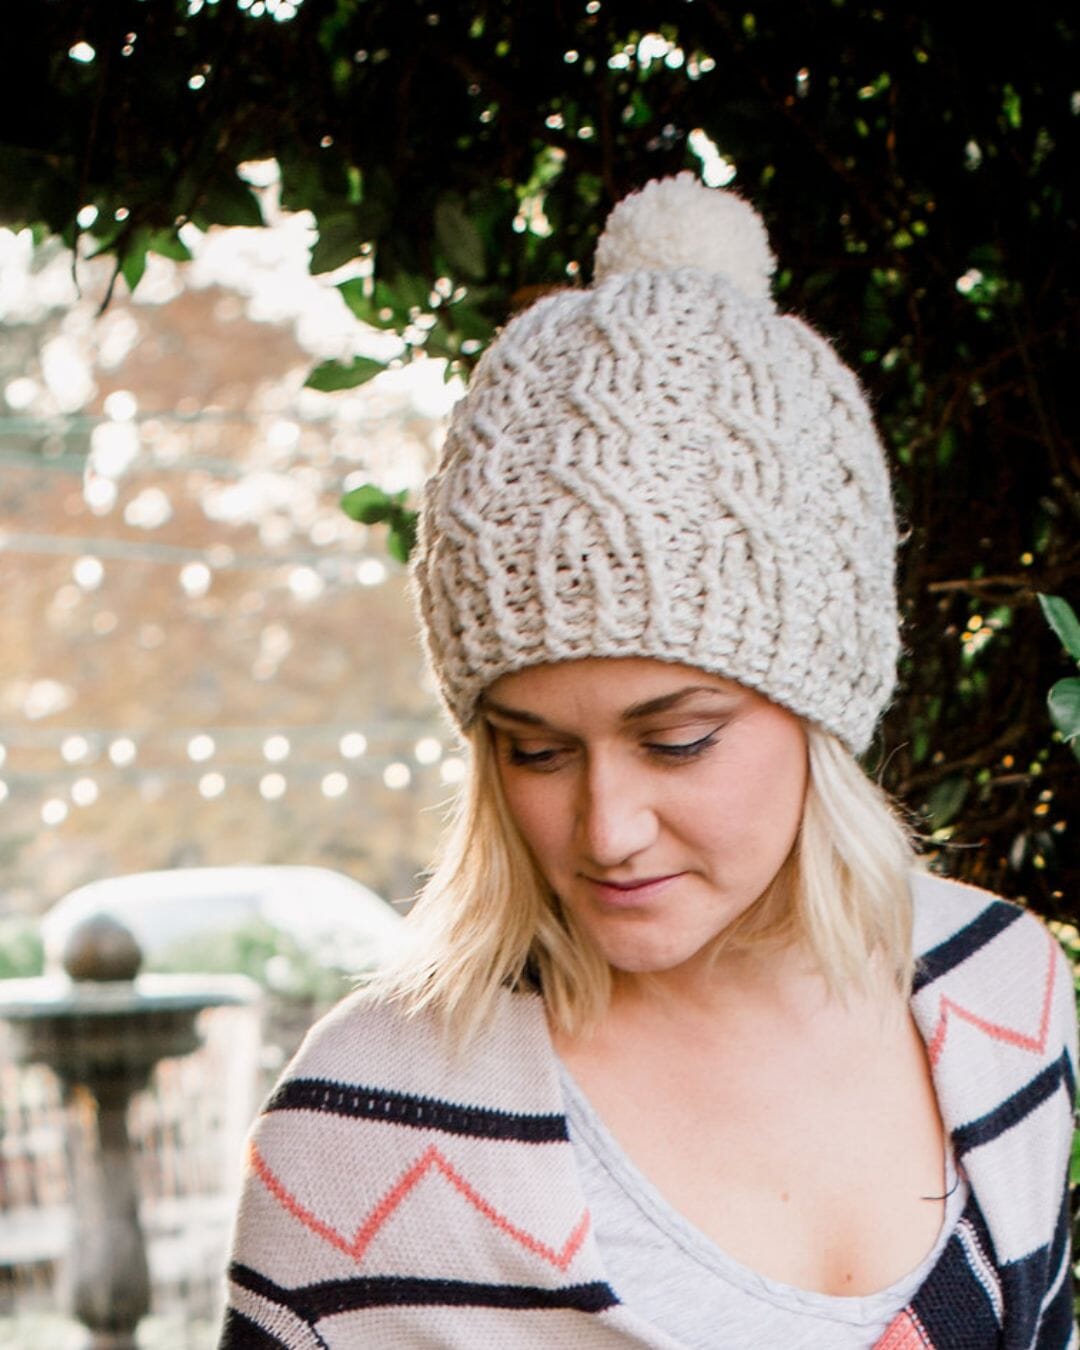
The Champagne Cables Hat features one of the most popular crochet cable patterns - one that shows off the amazing effects you can get with cables, without too much effort!
This hat is worked from the top down. Tamara will show you how to set up the cables, how to turn them into a face-framing ribbon and how to add the optional pom-pom.
SUPPLIES
MATERIALS
- US-J, 6.0mm Furls Crochet Hook
- 197 yds Lion Brand Wool-Ease (Worsted “4”; 80% acrylic/20% wool; 197 yds, 3 oz). Colorway shown: 098 Natural Heather

GAUGE
11 sts x 10 rows = 4” in pattern
SIZE
Fits most adults (22-24” head circumference)
FINISHED HAT DIMENSIONS
10” laid flat at brim; 8.75” long brim to crown
SPECIAL STITCH
Magic Circle - http://www.mooglyblog.com/the-magic-circle/

PATTERN DETAILS
ABBREVIATIONS
ch – chain
hdc – half double crochet
rep – repeat
rnd – round
RS – right side
st(s) – stitch(es)
WS – wrong side
yo – yarn over
SPECIAL TECHNIQUE
Magic Circle
Wrap yarn around your left index finger, leaving a 6" tail. Insert hook under yarn alongside finger, and pull up a loop. Ch 1, and begin working directly into center of circle, which can be tightened later by pulling on the yarn tail.
Here is a helpful video on the Magic Circle:
https://www.mooglyblog.com/the-magic-circle/
SPECIAL STITCHES
Fpdc (front post double crochet)
Yo, insert hook from front-to back-to-front around post of indicated st and pull up a loop, [yo and draw through 2 loops] twice.
Fptr (front post treble crochet)
Yo twice, insert hook from front-to back-to-front around post of indicated st and pull up a loop, [yo and draw through 2 loops] 3 times.
Fpdtr (front post double treble crochet)
Yo 3 times, insert hook from front-to back-to-front around post of indicated st and pull up a loop, [yo and draw through 2 loops] 4 times.
NOTES
• Hat is worked in joined rows, or turned rounds for Rnds 1-22.
• Use a st marker to mark the last st of each round to make beginning each new round easier.
• When instructed to join round, always join with a slip st in first st of round.

INSTRUCTIONS
HAT
Create a Magic Circle.
Rnd 1 (RS): Ch 1, 10 hdc in circle, join and turn.
Rnd 2: Ch 1, 2 hdc in each st around, join and turn. (20 sts)
Rnd 3: Ch 1, * fptr in st 2 rows below, 2 hdc in next st; rep from * around, join and turn. (30 sts)
Rnd 4: Ch 1, hdc in the first 2 sts, 2 hdc in next st, * hdc in the next 2 sts, 2 hdc in the next st; rep from * around, join and turn. (40 sts)
Rnd 5: Ch 1, * fptr in next fptr 2 rows below, hdc in next st, fptr again in previous fptr 2 rows below, 2 hdc in the next st; rep from * around, join and turn. (50 sts)
Rnd 6: Ch 1, hdc in first 3 sts, 2 hdc in the next st, * hdc in the next 4 sts, 2 hdc in the next st; rep from * to last st, hdc in last st, join and turn. (60 sts)
Rnd 7: Ch 1, * fptr in next fptr 2 rows below, fptr in next hdc 2 rows below, hdc in next st, fptr again in previous hdc 2 rows below, fptr in next fptr 2 rows below, hdc in next st; rep from * around, join and turn.
Rnd 8: Ch 1, hdc in each st around, join and turn.
Rnd 9: Ch 1, * fptr in each of next 2 fptr sts 2 rows below, hdc in next st; rep from * around, join and turn.
Rnd 10: Rep Rnd 8.
Rnd 11: Ch 1, * skip 3 sts, fpdtr in each of next 2 fptr 2 rows below, hdc in last skipped st, working in front of 2 fpdtr just made, fpdtr in each of 2 skipped fptr 2 rows below, hdc in next st; rep from * around, join and turn.
Rnd 12: Rep Rnd 8.
Rnds 13-22: Rep Rnds 9-12 twice more, then rep Rnds 9 and 10 only once more.
Note: For a slouchier hat, work 4 more rnds (or 1 more full rep) in pattern.
Brim
Rnd 23 (RS): Ch 1, fptr in first st 2 rows below, hdc in next st, * fptr in next st 2 rows below, hdc in next st; rep from * around, join but do NOT turn.
Rnds 24 and 25: Ch 1, fpdc in first st, bpdc in next st, * fpdc in next st, bpdc in next st; rep from * around, join.
Fasten off.
Weave in all loose ends.


ABOUT OUR DESIGNER
This pattern is by Tamara Kelly of Moogly.
Tamara Kelly is the designer and blogger behind Moogly, where you'll find weekly original patterns, videos tutorials, giveaways, and more. Tamara lives in Iowa, along the Mississippi River, with her 3 kids, husband (aka Tech Guy), dog, and lots of squirrels. She is also the author of Crochet Cables for the Home
Be sure to check out Tamara's book Quick Crochet for the Home


