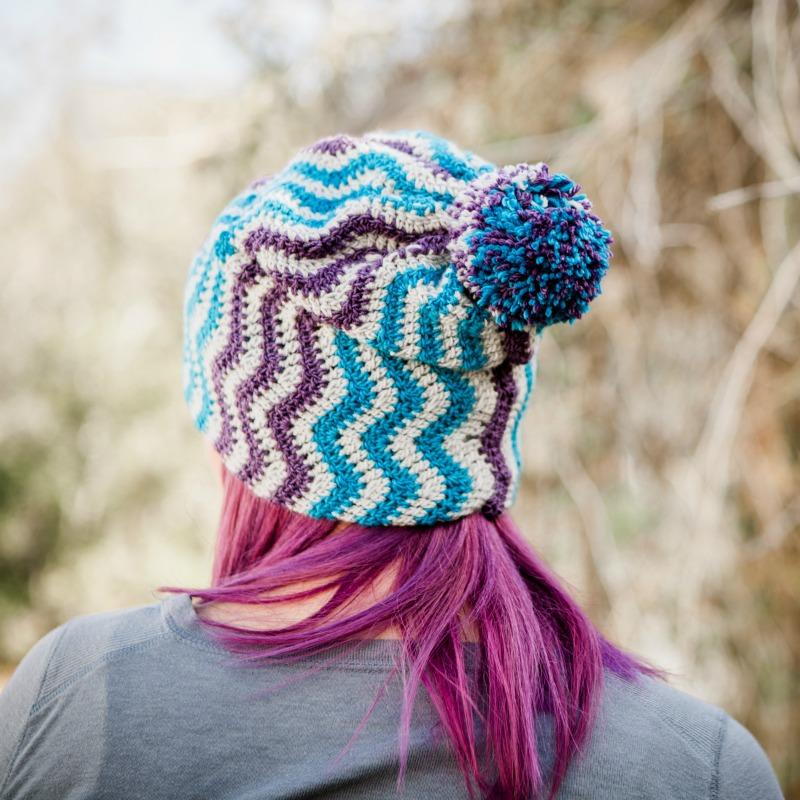
A slouchy, cozy, lightweight beanie with a lovely chevron pattern and double brim. This quick and easy design will keep you warm and stylish! The lightweight merino wool yarn makes for a soft and comfy beanie and the stripes bring out the beautiful chevron design.
This beanie is made by creating a rectangle and then seaming the brim on and sewing the top closed. Finally, an optional pompom can be added on the top! This beanie is meant to fit loose and “slouchy,” if you do not want a slouchy fit, there are directions for how to make a standard beanie, as well.
You will begin Part One of this CAL by choosing your yarn colors, you stripe pattern, swatching the gauge and working up the rectangle that will become your beanie.
In Part Two of this CAL you will assemble your beanie; sew in loose ends, close the top, seam up the brim, and add on a pompom. It’s as simple as that! In no time you will have a beautiful beanie for the cold winter months.
 Add to your Ravelry favorites | Join Fun with Furls
ABOUT OUR DESIGNER

SUPPLIES
-Whims Merino DK (Weight: 3/light - 3.5 oz/196 yd): one skein each in light grey, purple and blue; pattern uses roughly one entire skein of light grey and half of each purple and blue skein.
Total yards needed: size small: ~250 yards, size medium: ~300 yards, size large: 350 yards.
-Size G (4.0 mm) crochet hook - Odyssey in Red and Nickel
PATTERN DETAILS
Gauge
4” by 4” square = 18 st by 9 rows of dc with size G (4.0 mm) crochet hook

Abbreviations and Special Stitches
ch: chain
st: stitch
sl st: slip stitch
dc: double crochet
dc3tog: *yarn over, insert your hook into the next st, yo, pull up a loop, yo pull through two loops. Repeat from * two more times. Yo, pull through all four loops.

Sizing
The pattern is available in adult size small (~21 inches in circumference), medium ~22 inches in circumference), and large (~23 inches in circumference).
Notes
- Stitch ( ) and row counts [ ] for each size are given in order from smallest to largest (s, m, l,).
- Beginning chains do not count as stitches.

PART ONE
You will first create the body of the beanie by crocheting a rectangle; the chevrons will run vertically once finished. In Part Two you will assemble the beanie by folding the rectangle in half, single crocheting the rectangle into a 2 tube, closing the top, and sewing the brim up. Don’t forget your optional pompom!
Begin with grey yarn. Alternate grey and blue yarn for six rows, then alternate grey and purple yarn for six rows. Repeat striping pattern through the end of the pattern.
ch (50, 60, 70) Approximately ~13 inches, 14 inches, and 15 inches long respectively. For a non-slouchy beanie subtract ten chains from each size, you may have to adjust your brim size to accommodate this change.
Row 1: ch 2. dc in third chain from hook. dc in next 3 chs, dc3tog over next 3 chs *dc in next 3 chs, 3dc in next ch, dc in next 3 chs, d3tog over next 3 chs. Repeat from * to last 3 chs. dc in next 2 chs, 3dc in last ch, turn. [40, 50, 60]
Row 2: ch 2. dc in next 4 sts, dc3tog over next 3 sts. *dc in next 3 sts, 3dc in next st, dc in next 3 sts, d3tog over next 3 sts. Repeat from * to last 3 sts. dc in next 2 sts, 3dc in last st. turn [40, 50, 60] Repeat row 2 until row (40, 42, 44). Do not fasten off, move on to Part Two!
Repeat row 2 until row (40, 42, 44). Do not fasten off, fold rectangle in half, lining up the chevron edges valleys to peaks, and single crochet it closed into a tube (wrong side out). Fasten off and leave a long tail for sewing. Move on to Part Two!
PART TWO
CLOSING THE TOP
Leave the tube with the wrong side out and use the long tail to sew the beanie shut. Insert your hook through to the other side of the beanie at the center seam and sl st these two sides together. This will create two folds on either side of the center. Pull the center of each fold to your hook and sl st
them together as well. You should have four folds at this point. Repeat this process until you have 8 folds. Working from fold to fold, sl st them all closed as you work around the circle. Fasten off and weave in all ends.

CREATING THE BRIM
Leave the beanie inside out. Flip the bottom of the tube up ~4 inches to create a double brim (adjust this length to create a more or less slouchy beanie). If you have not been weaving in your ends from color changes as you go, this is a great time to tuck all of your ends into your brim.

Using your long yarn tail, sew the double brim into place by whip stitching the edge of the brim to the body of the hat. Pick up stitches close to the surface of the wrong side of the body (rather than going through all the way to the other side) when seaming the double brim in place to prevent the seam from being visible on the right side. Also, keep the chevron stripes lined up as you sew so your brim is straight and even. Fasten off and weave in ends.

Your beanie is finished, you can choose to add a pompom or leave it as is! 4


